Navigating the vast world of art can be daunting, especially when faced with a blank page. The key to consistent creativity isn't just about waiting for inspiration, but about building a versatile toolkit of techniques and approaches. This guide explores 10 essential ideas of drawing that serve as foundational pillars for any artist, from the aspiring beginner to the seasoned professional looking to refresh their skills. Each concept offers a unique way to see the world and translate it onto paper, helping you develop a robust artistic practice and overcome creative blocks.
We will break down each technique, providing actionable prompts and practical advice to integrate them into your daily routine. This ensures your sketchbook becomes a playground for endless exploration and skill development. You'll learn how to capture life with gesture drawing, master form through still life, and tell stories with character design. By exploring these varied concepts, you’ll not only find endless inspiration but also build the confidence to find and refine your unique artistic voice. Think of this as your roadmap to a more dynamic and fulfilling creative process, filled with tangible methods to keep you drawing consistently.
1. Gesture Drawing
Gesture drawing is a foundational technique that focuses on capturing the essential action, form, and pose of a subject, rather than its fine details. This method emphasizes speed and energy, with sketches typically completed in 30 seconds to five minutes. The goal is to convey the "gesture" or feeling of the subject, making it one of the most dynamic ideas of drawing to explore for improving your understanding of movement and form.
Gesture Drawing
This practice is fundamental in many creative fields. Animation studios, from Walt Disney to Pixar, use it to develop character poses that feel alive. Likewise, fashion designers rely on gesture sketches to quickly ideate clothing on dynamic figures, and sports illustrators use it to freeze an athlete's peak moment of action on the page.
How to Practice Gesture Drawing
To get started, focus on the overall flow rather than accuracy. Instead of getting bogged down in contours and shading, let your pencil move freely to capture the essence of the pose.
Start with the "Line of Action": Identify the primary curve or line that defines the subject's pose, often following the spine. Build your drawing around this foundational line.
Use Your Whole Arm: Move from your shoulder, not just your wrist. This encourages broader, more confident, and fluid strokes.
Keep Your Pencil on the Page: Try to draw the figure with a continuous line as much as possible. This helps you see the subject as a whole, interconnected form.
Work with Timed Poses: Use a timer to challenge yourself. Begin with 2-3 minute poses and gradually work your way down to 30-second sketches to train your eye and hand to work faster.
2. Still Life Drawing
Still life drawing is the artistic practice of representing inanimate objects arranged in a composed setting. As a fundamental approach, it allows artists to study form, light, shadow, texture, and composition in a controlled environment. The goal is to accurately capture the interplay between different elements, making it one of the most effective ideas of drawing for honing observational skills.
Still Life Drawing
This practice is a cornerstone of classical art education and remains essential for artists today. Masters like Paul Cézanne used still life to explore form and color, famously with his fruit and pottery studies. Giorgio Morandi dedicated his career to subtle compositions of bottles and vases. It’s a timeless exercise for anyone, from a beginner learning the basics to a professional experimenting with new techniques.
How to Practice Still Life Drawing
To get started, create a simple arrangement and focus on careful observation. Unlike gesture drawing, still life is about precision and patience, allowing you to build a drawing methodically from basic shapes to intricate details.
Arrange Objects Thoughtfully: Place objects of varying heights, shapes, and textures together to create a more dynamic composition. Start with simple geometric forms like spheres or boxes.
Use a Single Light Source: Position a lamp or use a window to create clear, defined shadows. This makes it easier to understand how light falls across different forms and surfaces.
Begin with Contour Lines: First, carefully draw the outlines and primary shapes of your subjects. Focus on accurate proportions and placement before moving on to shading.
Study One Material at a Time: Dedicate a drawing session to a specific texture, such as reflective glass, dull metal, or soft fabric. This will help you master rendering different surfaces.
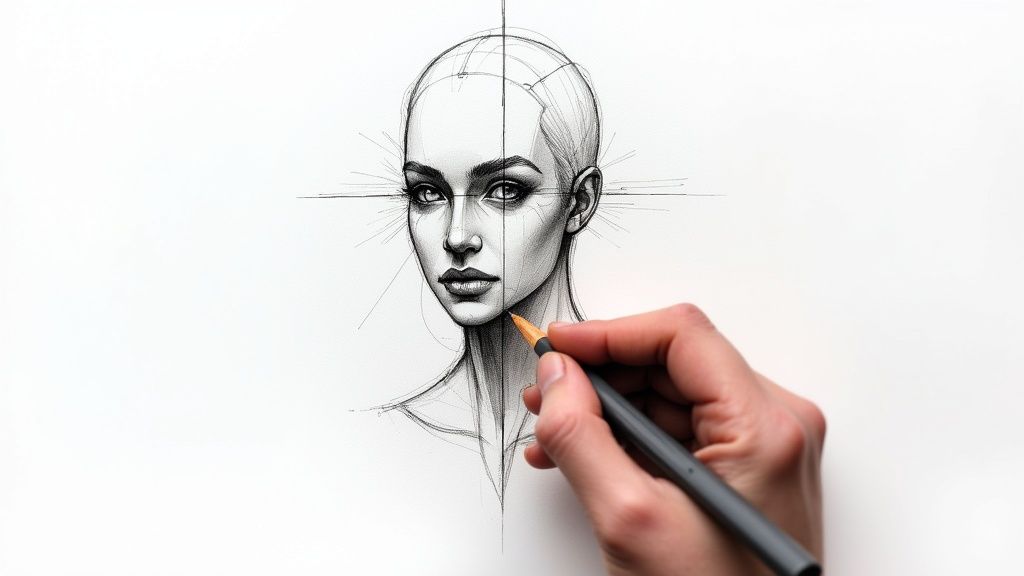
3. Portrait Drawing
Portrait drawing is the art of capturing the likeness, personality, and mood of a person. More than just a technical exercise, it blends anatomical knowledge with psychological insight to create a compelling representation of an individual. This discipline challenges artists to see beyond surface features and interpret the essence of their subject, making it one of the most rewarding ideas of drawing for developing both observational and expressive skills.
Portrait Drawing
From Leonardo da Vinci’s intricate anatomical studies to the expressive charcoal portraits of John Singer Sargent, this art form has a rich history. Contemporary artists continue to push its boundaries, using portraiture to explore identity, emotion, and social commentary. Professional portrait commissions remain a popular way for artists to apply their skills, creating timeless heirlooms for clients. For those seeking a fresh challenge, exploring unique themes can add a creative spin. Explore some drawing ideas for an easy portrait with a twist to further your practice.
How to Practice Portrait Drawing
Achieving a convincing likeness requires a systematic approach. By breaking down the face into manageable shapes and proportions, the complexity becomes much more approachable.
Learn Basic Facial Proportions: Start by studying foundational guidelines, like the Loomis method, which helps place features correctly on the head.
Focus on the Eyes First: The eyes are often called the "windows to the soul" for a reason. Capturing their placement and expression is crucial for establishing a connection with the viewer.
Use a Grid System: For beginners struggling with accuracy, a grid can help transfer proportions from a reference photo to your paper with greater precision.
Start with Profile Views: Drawing a face from the side (profile) can be less intimidating than a front-facing or three-quarter view, allowing you to focus on the silhouette and key landmarks.
4. Landscape Drawing
Landscape drawing is the artistic representation of natural scenery, capturing everything from mountains and forests to rivers and skies. This approach focuses on conveying the beauty and atmosphere of an outdoor environment. It's one of the most classic ideas of drawing, perfect for learning essential skills like perspective, composition, and creating atmospheric depth.
Landscape Drawing
This timeless practice has been central to artistic movements for centuries. The Hudson River School artists, like Thomas Cole, used it to depict the grandeur of the American wilderness, while Chinese brush painting traditions masterfully captured the spiritual essence of nature. Modern artists like David Hockney continue to reinvent landscape art, proving its enduring appeal for both artists and viewers.
How to Practice Landscape Drawing
To start, focus on structuring your scene and creating a sense of depth rather than getting lost in tiny details. Your main goal is to guide the viewer's eye through the environment you've created.
Establish Layers: Clearly define a foreground, middle ground, and background. This simple structure immediately creates a sense of space and depth in your composition.
Use Atmospheric Perspective: Draw distant objects with lighter lines and less detail to make them appear farther away. Objects in the foreground should have stronger contrast and sharper focus.
Start with Simple Compositions: Don't try to draw an entire panoramic vista at once. Begin with a scene containing just two or three key elements, like a single tree, a hill, and the sky.
Study Cloud Formations: Clouds are not just random puffs; they have structure and cast shadows on the land below. Observing them adds realism and drama to your work.
Work Quickly Outdoors: When drawing "en plein air" (outdoors), light and weather change fast. Sketch quickly to capture the fleeting moments and atmosphere.
5. Contour Line Drawing
Contour line drawing is a technique focused on defining the outer edges and interior planes of a subject using only lines. This method intentionally omits shading and tonal value, forcing the artist to rely on pure linework to describe form. It is a powerful exercise for developing observational skills and hand-eye coordination, making it one of the most fundamental ideas of drawing for any beginner.
This practice is a cornerstone of art education and is widely used in various creative applications. It forms the basis for many of Pablo Picasso's and Henri Matisse's famous single-line works, which capture complex forms with incredible simplicity. Today, it’s used in everything from minimalist illustration and tattoo design to therapeutic art exercises, where it helps participants focus on the present moment.
How to Practice Contour Line Drawing
To begin, the goal is to train your eye to follow the edges of an object and translate that information directly through your hand, almost as if your pencil tip is touching the subject itself.
Try Blind Contour Drawing: Draw your subject for 5-10 minutes without looking at your paper. This forces you to trust your observation and enhances the connection between your eye and hand.
Keep Your Eyes on the Subject: When practicing any contour drawing, aim to look at your subject 90% of the time and your paper only 10%. This prioritizes observation over the final result.
Maintain a Continuous Line: For blind contour drawing, challenge yourself to not lift your pencil from the page. This creates a single, uninterrupted line that maps your eye's journey.
Start with Simple Objects: Begin with everyday items like your own hand, a piece of fruit, or a coffee mug before moving on to more complex forms.
Focus on Line Variation: As you become more comfortable, experiment with varying the pressure of your pencil to create lines of different weights, suggesting form and depth.
6. Perspective Drawing
Perspective drawing is a fundamental technique that creates the illusion of three-dimensional space and depth on a two-dimensional surface. This method uses mathematical principles, such as vanishing points and horizon lines, to accurately represent objects as they recede into the distance. Mastering perspective is one of the most transformative ideas of drawing, as it adds realism and believability to any scene.
This technique is essential across numerous disciplines. Renaissance masters like Filippo Brunelleschi used it to create groundbreaking works with realistic depth. Today, architects rely on it for structural renderings, comic book artists use it to build immersive backgrounds, and urban sketchers apply it to capture the scale of cityscapes. It's the framework that makes environments convincing.
How to Practice Perspective Drawing
To begin, focus on understanding the core systems, starting with the simplest. Grasping these rules will allow you to construct any environment with accuracy. Incorporating these practices is a crucial step if you want to understand how to get better at drawing.
Master One-Point Perspective First: Start by drawing simple forms, like cubes, that recede to a single vanishing point on the horizon line. This builds a strong foundation.
Use a Ruler for Construction Lines: Initially, use a ruler to draw your horizon line and orthogonal lines leading to the vanishing points. This ensures precision as you learn the rules.
Study Photographs: Look at photos of buildings, roads, and interiors. Try to identify the horizon line and find where the parallel lines converge to locate the vanishing points.
Advance to Two and Three-Point: Once comfortable with one-point, move on to two-point perspective for drawing corners of buildings, and then three-point for dramatic high or low-angle views.
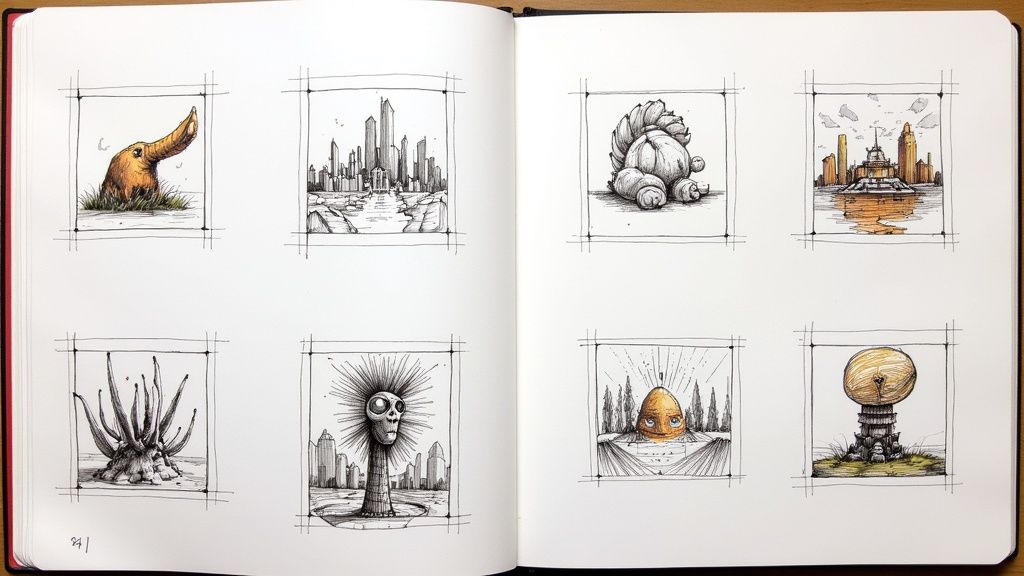
7. Character Design Drawing
Character design drawing is the art of creating a unique, memorable, and visually compelling character from imagination. It goes beyond simple portraits by infusing a figure with personality, backstory, and function through deliberate choices in shape, proportion, and costume. This process is one of the most fulfilling ideas of drawing because it blends storytelling with visual art, allowing you to bring a new being to life on the page.
This discipline is the backbone of animation, video games, comics, and branding. Iconic figures from Disney's Glen Keane, the creator of Ariel and the Beast, or Nintendo's legendary characters like Mario, are powerful examples of how design can create an emotional connection. Their success lies in visual storytelling that communicates who a character is before they even speak a line of dialogue.
How to Practice Character Design Drawing
To begin, focus on conveying personality through visual cues. Every line and shape should contribute to the character's story and make them instantly recognizable.
Start with Simple Geometric Shapes: Use circles, squares, and triangles as the foundation. Circles often convey friendliness and innocence, squares suggest stability and stubbornness, and triangles can imply dynamism or villainy.
Develop a Strong Silhouette: A character should be identifiable from their outline alone. Exaggerate key features to create a unique and memorable shape that stands out.
Create a Backstory: Before you draw, write a brief bio. What are their goals, fears, and quirks? Use these details to inform your design choices, from their posture to their clothing.
Practice Drawing from Multiple Angles: A successful design must be consistent and believable from every viewpoint. Draw your character in different poses and from the front, side, and three-quarter views to ensure the design is solid.
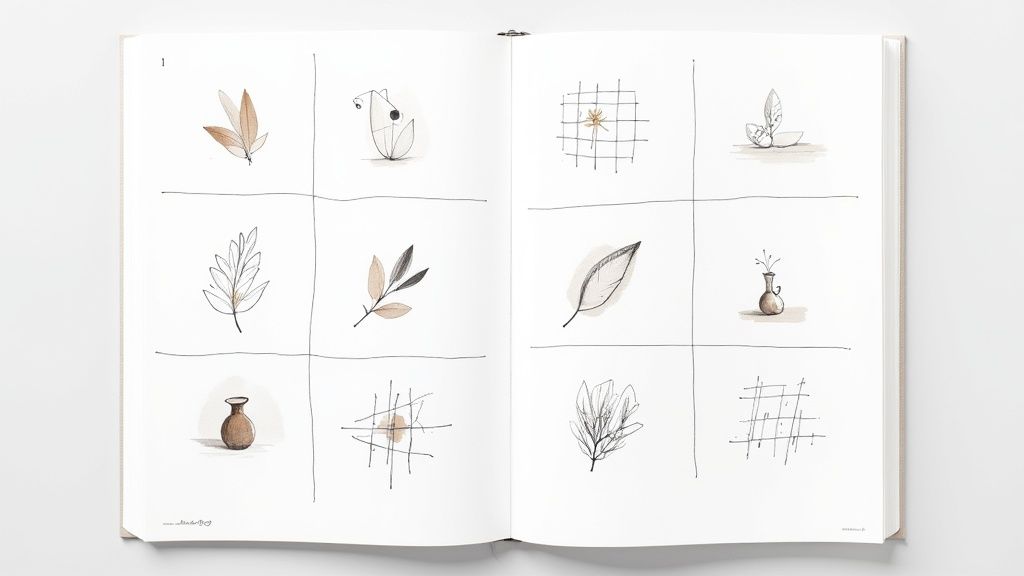
8. Botanical Drawing
Botanical drawing is the precise and detailed illustration of plants, flowers, and other botanical subjects, blending artistic beauty with scientific accuracy. This traditional art form demands careful observation and technical precision, making it a meditative and rewarding idea of drawing for artists who appreciate nature's intricate details. The goal is to create a true-to-life representation that is both aesthetically pleasing and scientifically informative.
This discipline has a rich history, essential for scientific documentation long before photography. Historical artists like Maria Sibylla Merian and Pierre-Joseph Redouté created works that are still celebrated for their accuracy and artistry. Today, botanical art remains vital in field guides, scientific publications, and is practiced by contemporary artists like Billy Showell, who push the medium forward with modern techniques.
How to Practice Botanical Drawing
To excel at botanical drawing, focus on patient observation and building your rendering skills. The key is to capture the unique structure and texture of your plant subject.
Start with Simple Studies: Begin by drawing individual leaves or simple flowers. Focus on accurately capturing their shape, vein patterns, and structure before moving to more complex arrangements.
Work from Live Specimens: Whenever possible, use a live plant rather than a photo. This allows you to observe it from all angles and understand its three-dimensional form and how light interacts with it.
Use a Magnifying Glass: Details are crucial in botanical art. A magnifying glass will help you see and render the tiny, intricate details of a plant, like the texture of a petal or the fine hairs on a stem.
Learn Basic Plant Anatomy: Familiarize yourself with terms like "stamen," "pistil," and "sepal." Understanding the basic parts of a plant will help you draw it more accurately and with greater confidence.
9. Urban Sketching
Urban sketching is the practice of drawing on location in cities, towns, and other urban areas, capturing the world directly as you observe it. This artistic movement is less about creating a perfect, studio-quality piece and more about documenting a moment in time, telling a story, and conveying the atmosphere of a place. It transforms the act of drawing into an exploration, making it one of the most engaging ideas of drawing for artists who love to travel and observe.
This practice is championed by the global community Urban Sketchers, founded by Gabriel Campanario, which encourages artists to share their on-location drawings online. From detailed architectural studies of historic buildings to lively scenes of bustling cafes and street markets, urban sketching turns an artist's sketchbook into a vibrant travel journal. It’s a powerful way to connect more deeply with your surroundings, noticing details that might otherwise go unseen.
How to Practice Urban Sketching
To get started, the key is to embrace imperfection and focus on capturing the spirit of the location. A simple, portable kit is all you need to begin your visual diary. For additional inspiration, you can learn more about easy urban sketch drawing ideas.
Start Somewhere Familiar: Begin in a comfortable spot like your local park or a favorite coffee shop to build confidence before venturing into busier environments.
Keep Your Kit Simple: A sketchbook, a pen, and a small watercolor set are often all you need. Portability is crucial for drawing on the go.
Focus on Atmosphere: Don't get lost in rendering every single brick or leaf. Instead, try to capture the overall feeling, light, and energy of the scene.
Use Thumbnail Sketches: Before starting a larger drawing, create a few small, quick thumbnail compositions to decide on the best angle and focus for your sketch.
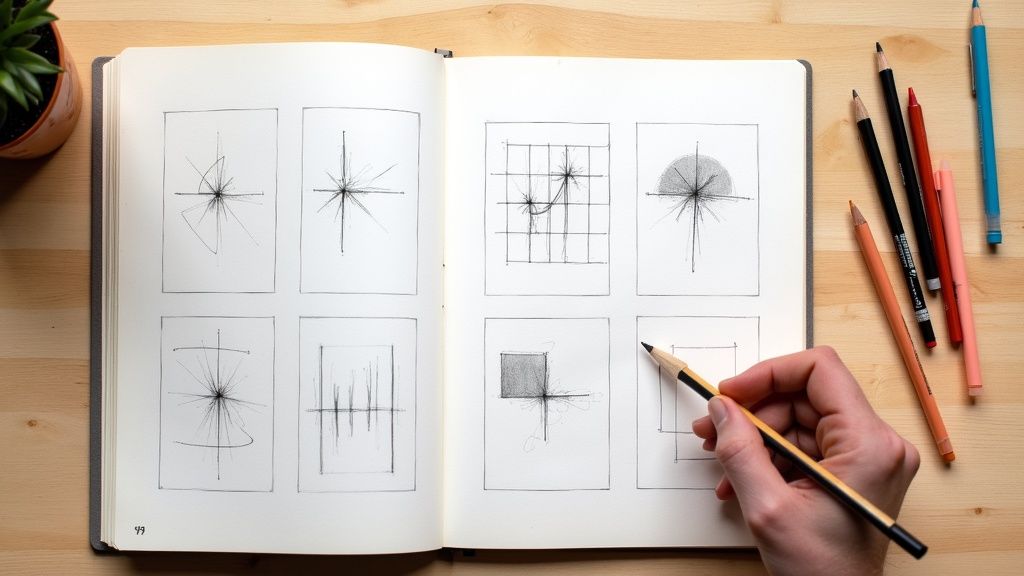
10. Abstract Drawing
Abstract drawing is a powerful form of artistic expression that deliberately moves away from realistic representation. Instead of depicting a recognizable person, place, or thing, this approach uses shapes, forms, colors, and gestural marks as the primary subject matter. It's one of the most liberating ideas of drawing, allowing artists to prioritize emotional expression, experimentation, and personal interpretation over literal accuracy.
This method is central to modern and contemporary art, seen in the groundbreaking color and form studies of Wassily Kandinsky and the playful visual language of Paul Klee. Today, abstract principles are used in everything from therapeutic art practices, where it helps individuals express feelings non-verbally, to experimental workshops that push the boundaries of what drawing can be. It's a fantastic way to break free from the pressure of perfection.
How to Practice Abstract Drawing
To start with abstract art, your goal is to explore and express, not to replicate. The focus shifts from what you see to what you feel, think, or hear, translating those internal experiences into visual form.
Start with Music: Put on an instrumental piece of music and let the sound guide your hand. Use lines, colors, and shapes to represent the tempo, melody, and emotion of the song.
Experiment with Unusual Tools: Ditch the pencil and try drawing with a palette knife, a sponge, a stick dipped in ink, or even your non-dominant hand. This forces you to abandon control and discover new marks.
Focus on a Single Emotion: Choose an emotion like "joy," "anxiety," or "calm." Without planning, fill the page with marks and colors that you feel represent that emotion.
Study Abstract Masters: Analyze the work of artists like Joan Miró or Cy Twombly. Pay attention to their use of line, composition, and space to understand how they created balance and impact without realism.
10 Drawing Ideas Comparison Guide
Drawing Technique | Implementation Complexity | Resource Requirements | Expected Outcomes | Ideal Use Cases | Key Advantages |
|---|---|---|---|---|---|
Gesture Drawing | Low to moderate; quick execution | Minimal; basic drawing tools | Captures movement and energy quickly | Warm-ups, animation, quick figure study | Improves hand-eye coordination, fluidity |
Still Life Drawing | Moderate; controlled setup | Objects, lighting setup | Detailed study of form, light, and texture | Classical training, detail practice | Develops detail observation, patience |
Portrait Drawing | High; requires precision and anatomy knowledge | Basic to advanced drawing tools | Accurate likeness and expressive faces | Commissions, fine art, emotional impact | Develops accuracy and emotional depth |
Landscape Drawing | Moderate to high; varies with environment | Portable tools, location access | Atmospheric and spatial depth capture | Outdoor scenes, nature study | Teaches perspective, connects with nature |
Contour Line Drawing | Low; focuses on simple line work | Basic drawing tools | Sharp observation, improved line quality | Fundamentals, hand-eye coordination | Boosts observation, reduces fear of errors |
Perspective Drawing | High; involves rules and mathematical setup | Ruler, drawing aids | Realistic spatial depth and structure | Architecture, comics, technical drawing | Improves accuracy, systematic approach |
Character Design Drawing | Moderate to high; combines skill and creativity | Drawing tools, references | Unique, expressive character visuals | Animation, gaming, comics | Strong creative expression, industry demand |
Botanical Drawing | High; demands scientific accuracy and detail | Specialized references, specimens | Precise, detailed plant illustrations | Scientific illustration, natural study | Combines art and science, high detail |
Urban Sketching | Moderate; on-location quick drawing | Portable sketch materials | Captures urban life and atmosphere | Travel, visual journaling, architecture | Develops quick sketching, exploration |
Abstract Drawing | Low to moderate; non-technical focus | Any drawing tools | Expressive, non-representational work | Experimental, therapeutic art | Creative freedom, personal expression |
Integrating These Ideas into Your Daily Practice
We’ve explored a diverse landscape of creative prompts, from the energetic motion of gesture drawing to the meticulous detail of botanical illustration. Each of these ten ideas of drawing represents not just a standalone exercise, but a fundamental pillar supporting a robust artistic skill set. The true power lies not in mastering one, but in understanding how they interconnect to build a versatile and confident creative practice.
The journey from a blank page to a finished piece is paved with continuous learning and deliberate practice. The concepts we've covered, such as perspective, contour lines, and character design, are the essential tools in your artistic vocabulary. Moving forward, the goal is to weave these distinct approaches into a seamless, intuitive workflow. Think of it as building a well-stocked toolbox; you may not use every tool for every project, but knowing they are there, and knowing how to use them, gives you the freedom to tackle any creative challenge.
Your Actionable Path Forward
To translate inspiration into tangible skill, you need a structured approach. Instead of randomly picking a drawing idea, create a deliberate practice schedule that encourages growth and prevents creative stagnation. This transforms passive reading into active doing.
Here are some practical next steps to truly embed these techniques into your artistic DNA:
The Weekly Focus: Dedicate one full week to each of the ten drawing ideas. For your "Gesture Drawing" week, fill pages with 30-second and 60-second poses. During "Urban Sketching" week, commit to drawing on location for at least 15 minutes every day, focusing on capturing the essence of a scene. This immersive method builds muscle memory and deepens your understanding of each concept.
Create Technique Fusions: The most exciting growth happens at the intersection of these ideas. Challenge yourself to combine them in a single piece. For example, create a character design using only contour lines, or draw a still life arrangement with a strong emphasis on one-point perspective. This cross-pollination will break you out of rigid thinking and lead to unique stylistic discoveries.
Document and Reflect: Keep a dedicated sketchbook for these exercises. At the end of each week, write a few short notes about what you learned, what you struggled with, and what you enjoyed. This reflective practice is crucial for identifying patterns in your work and recognizing areas for improvement. It turns simple practice into mindful, progressive learning.
Ultimately, the value of exploring these diverse ideas of drawing is achieving creative fluency. When you no longer have to consciously think about the mechanics of perspective or the principles of gesture, you are free to focus entirely on your vision and your message. The techniques become an extension of your hand, allowing you to bring the worlds in your imagination to life with clarity and impact. This is where your unique artistic voice truly begins to emerge.
Never face a blank page again. If you're looking for endless subject matter to practice these techniques, the idea generator at Drawing List provides curated prompts for any skill level or interest. Find your next inspiration and keep your creative momentum going at Drawing List.