The blank page can feel intimidating, a vast white space waiting for the perfect mark. But what if the secret to becoming a better artist isn't about achieving immediate perfection, but about consistent, focused practice? This guide demystifies the process, breaking it down into a collection of manageable and highly effective simple drawing exercises. Each one is specifically designed to build your foundational skills one line at a time, moving you from uncertainty to confidence. Forget the pressure to create a finished masterpiece right away. Instead, we will concentrate on the powerful, repeatable drills that train your hand, sharpen your observational skills, and build the crucial muscle memory that every artist relies upon.
This roundup provides a clear roadmap for tangible improvement. Inside, you will find seven distinct exercises, each with step-by-step instructions, practical tips, and explanations of the specific skills they develop. We will explore everything from capturing the essence of a subject with gesture drawing to understanding form through value studies. Whether you are a complete beginner picking up a pencil for the first time or a seasoned artist looking to warm up and refine your fundamentals, these exercises offer a structured path to progress. Let’s transform that blank page from a challenge into an opportunity.
1. Contour Line Drawing: Training Your Eye to Lead Your Hand
Contour line drawing is a classic and powerful observational exercise designed to build a strong connection between your eyes and your hand. Instead of aiming for a realistic depiction, the goal is to carefully trace the outer edges and internal contours of an object with a single, continuous line. This simple drawing exercise forces you to slow down and truly see your subject, observing every curve, bump, and detail.
The core principle is to let your eyes guide your pencil. You should spend the vast majority of your time looking at the object you are drawing, not at your paper. This practice silences the part of your brain that wants to draw what it thinks an object looks like (a symbol) and instead draws what is actually there. The resulting image often looks distorted or abstract, but that's a sign of success. The wobbly, imperfect lines are evidence that you were truly observing.
How to Practice Contour Drawing
Choose Your Subject: Start with a simple, stationary object. Your own hand, a piece of fruit, a crumpled piece of paper, or a shoe are all excellent choices.
Position Yourself: Sit comfortably where you can see the object clearly without having to move your head too much. Place your sketchbook or paper to the side.
Start Drawing: Place your pencil on the paper and pick a starting point on your object. Begin moving your eyes slowly along the contour of the object. As your eyes move, your hand should move in unison on the paper, as if your pencil tip is directly touching the subject.
Stay Focused: Resist the urge to look at your paper. Keep your eyes locked on the subject. Don’t lift your pencil until you have completed the entire outline.
Tips for Success
Go Blind: For an even greater challenge, try blind contour drawing. This means you commit to not looking at your paper at all until the drawing is finished. This variation maximizes the hand-eye coordination benefit.
Move Slowly: Think of your eye as an ant crawling along the edges of your subject. Your pencil should move at the same slow, deliberate pace.
Embrace Imperfection: The finished drawing is not the main goal. The true value is in the process of intense observation. The final product is just a record of that focused attention.
This exercise is fundamental for any beginner because it builds the foundational skill of observation. It teaches you to trust what you see over what you know, which is a cornerstone of drawing from life.
2. Gesture Drawing: Capturing Energy and Movement
Gesture drawing is a foundational practice focused on capturing the essential action, form, and energy of a subject, not its details. This simple drawing exercise involves quick, fluid sketches, typically completed in a very short time frame, from 30 seconds to just a few minutes. The primary goal is to train your hand to see and record the overall flow and rhythm of a figure or object, prioritizing movement over accuracy.
This technique is less about creating a finished piece and more about understanding the fundamental structure and dynamics of your subject. It forces you to make quick decisions, focusing on the main lines of action and the relationship between major forms. Practiced by animators at studios like Disney and Pixar for character development, gesture drawing is a powerful tool for breathing life and energy into your art, moving beyond stiff, static figures.
Gesture Drawing
How to Practice Gesture Drawing
Find Your Subject: Dynamic subjects are best. Use online resources with timed photo references (like Line of Action), ask a friend to pose, or even sketch people in a park or coffee shop.
Set a Timer: This is crucial. Start with short durations, like 30 or 60 seconds per pose. This pressure forces you to simplify and focus only on the essential information.
Start with the Core: Identify the "line of action," a single, expressive line that runs through the spine or central axis of the pose. Build the rest of your drawing around this foundational line.
Work General to Specific: Use loose, sweeping strokes to capture the general shapes of the torso, head, and limbs. Don’t get caught up in drawing fingers or facial features; focus on the overall pose. If you're looking for inspiration, you can explore various pose ideas for drawing on drawinglist.com.
Tips for Success
Use Your Whole Arm: Draw from your shoulder, not just your wrist. This encourages longer, more fluid lines and helps capture the energy of the pose.
Don't Erase: Mistakes are part of the process. Drawing over old lines reinforces your decision-making and keeps the drawing's energy alive. Each mark is a step in finding the form.
Embrace the Mess: Your gesture drawings will look scribbly and unfinished. That’s the point. The goal is to capture a feeling of movement, not a perfect rendering.
This exercise is invaluable for developing a sense of rhythm, proportion, and weight in your drawings. It trains you to quickly analyze a subject's core structure, a skill that enhances all other forms of drawing, from quick sketches to detailed illustrations.
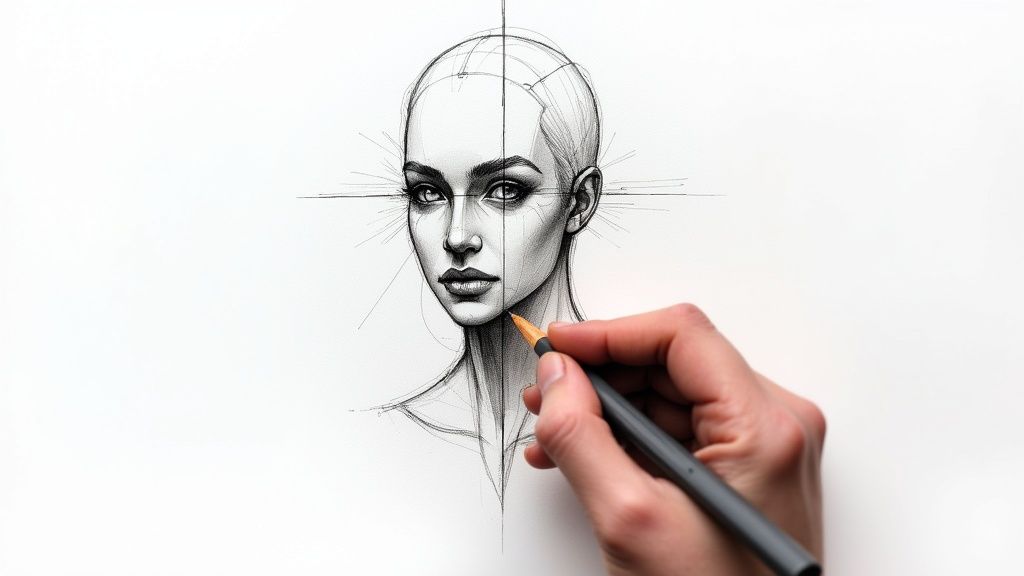
3. Basic Shape Construction: Building Complex Forms from Simple Shapes
Basic shape construction is a fundamental drawing method that demystifies complex subjects by breaking them down into simple, manageable geometric forms. Instead of being intimidated by an intricate object, you learn to see the underlying structure composed of circles, squares, cylinders, and triangles. This approach transforms drawing from a guessing game into a logical process of building, allowing for greater accuracy in proportion and perspective.
This exercise trains your brain to analyze and simplify, a critical skill for any artist. Pioneered by masters like Andrew Loomis, this technique is the bedrock of everything from character design to architectural sketching. It allows you to construct a solid "scaffolding" for your drawing, ensuring that the final details have a believable and structurally sound foundation. The goal isn't to draw perfect shapes, but to use them as a guide to capture the volume and form of your subject.
Basic Shape Construction
How to Practice Basic Shape Construction
Select Your Subject: Choose an object with a clear structure, such as a coffee mug (cylinder and a curved handle), a book (a rectangular prism), or a piece of fruit like an apple (a sphere).
Identify the Core Shapes: Look at your subject and mentally break it down. Is the main body a sphere? Is the neck a cylinder? Are the legs cones?
Sketch the Construction: Lightly sketch these basic 3D forms (spheres, cubes, cylinders) onto your paper. Don't worry about details yet. Focus on getting the size, placement, and relationship of these shapes correct.
Refine and Connect: Once your "scaffolding" is in place, begin to refine the outline, connecting the simple shapes to create the more complex contour of the object. You can then erase your initial construction lines.
Tips for Success
Think in 3D: Always consider the volume of the shapes you are drawing. A circle represents a sphere, and a square represents a cube. Try to visualize these forms as solid objects in space.
Use Light Lines: Keep your initial construction lines very light and loose. These are guides, not the final drawing, so they should be easy to erase or draw over.
Start Simple, Then Build: Begin with single, simple objects. As you become more confident, move on to combining them, like a bowl of fruit, before tackling highly complex subjects like the human figure.
This exercise is one of the most vital simple drawing exercises because it builds an artist's ability to see and interpret form. It provides a reliable roadmap for drawing anything you can imagine, ensuring your creations are grounded in a believable reality.
4. Value Studies and Shading Practice: Giving Form to Your Lines
Value studies are simple drawing exercises focused on understanding and rendering light and shadow. Instead of just outlines, you explore the full range of tones from the brightest white to the deepest black. This practice is crucial for moving beyond flat, two-dimensional shapes and creating the illusion of volume, depth, and form on a flat surface. It trains your eye to see how light interacts with objects, revealing their structure through highlights, mid-tones, and shadows.
Value Studies and Shading Practice
The core principle of a value study is to simplify what you see into distinct areas of tone. By learning to accurately place these values, you can convincingly model a subject, making a circle look like a sphere or a square look like a cube. This exercise is less about detail and more about capturing the "big picture" of light and form. Mastering values is what gives your drawings a sense of realism and solidity. This is a foundational skill taught in programs from classical ateliers to digital art courses. For a deeper look into similar foundational skills, you can explore other drawing exercises to improve your abilities.
How to Practice Value and Shading
Create a Value Scale: Before you start, draw a long rectangle and divide it into 5 or 10 sections. Shade it from pure white on one end to solid black on the other. This will be your reference tool.
Choose a Simple Subject: A sphere, an egg, or a cube is perfect. Place it under a single, strong light source to create clear, defined shadows.
Establish Your Tones: Lightly sketch the outline of your object. Then, identify the darkest darks and the lightest lights. Begin shading the major shadow shapes first, using your value scale as a guide.
Build Up Slowly: Gradually add mid-tones to transition between your light and dark areas. Focus on rendering the form smoothly and accurately representing how the light falls across the surface.
Tips for Success
Squint Your Eyes: Squinting at your subject helps blur out unnecessary details and makes the major value shapes (the lights and darks) much easier to see and distinguish.
Consistent Lighting: Always use a single, direct light source. This creates predictable shadows and makes it easier to understand how light wraps around a form.
Start with Basic Forms: Before tackling a complex portrait or still life, master shading a sphere, cube, and cylinder. These are the building blocks of all other forms.
Control Your Blending: Use blending tools like stumps or tortillons sparingly. Over-blending can make a drawing look muddy. Try to achieve smooth transitions through careful pencil strokes first.
This exercise is essential for any artist who wants to create believable, three-dimensional drawings. It bridges the gap between line art and realistic rendering, giving your work weight and presence.
5. Blind Drawing Exercise: Learning to Trust Your Eyes
The blind drawing exercise is a more intensive version of contour drawing that completely removes your paper from your field of vision. This simple drawing exercise involves drawing a subject while looking at it 100% of the time, never once glancing down at your drawing. The purpose is to forge an unbreakable link between what your eyes see and what your hand draws, forcing you to rely entirely on observation.
This technique is designed to dismantle the habit of drawing based on preconceived symbols stored in your brain. When you can't see the marks you're making, you are forced to slow down and translate visual information directly into physical movement. The resulting drawings are often wonderfully strange and distorted, but they capture an essence and a sensitivity to form that more calculated drawings can miss. This is not about the final product; it's about the process of pure, unedited observation.
How to Practice Blind Drawing
Select a Subject: Choose something with interesting contours and details. Your non-drawing hand, a houseplant, or a set of keys are great starting points.
Get Set Up: Position your paper and drawing tool where you can comfortably reach them, but turn your body or head so you cannot see the paper at all.
Begin Drawing: Pick a point on your subject to start. Place your pen or pencil on the paper and begin to move your eyes along the object’s edges. Your hand should mimic the movement of your eyes in real-time.
Commit Fully: The most important rule is to not peek. Resist the temptation to check your progress. Continue drawing with a single, unbroken line until you feel you have captured the main contours.
Tips for Success
Move Slowly: Imagine your eye is physically touching the surface of the object. Let your pencil travel at this same deliberate, investigative speed.
Feel the Form: Try to translate the sensation of sight into the sensation of touch. As your eye moves over a curve, your hand should draw that same curve.
Embrace the Weird: Your drawing will not look realistic, and that is the entire point. Celebrate the disjointed lines and strange proportions as evidence of a successful exercise.
Short Bursts: Start with short, focused sessions of 5-10 minutes. This exercise demands intense concentration, and it's better to do it well for a short period than to lose focus over a longer one.
This exercise is fundamental for breaking through creative blocks and unlearning bad habits. Popularized by instructors like Betty Edwards in "Drawing on the Right Side of the Brain," it teaches artists of all levels to prioritize seeing over knowing, a skill essential for authentic and expressive drawing.
6. Line Weight and Quality Practice: Giving Your Lines a Voice
Line weight and quality practice is a foundational exercise focused on controlling the thickness, darkness, and character of your lines. This skill transforms a flat, uniform drawing into something with depth, hierarchy, and personality. Instead of every line looking the same, you learn to use varied strokes to guide the viewer’s eye, suggest light and shadow, and convey texture or emotion.
The core principle is that not all lines are created equal. A thick, dark line appears closer and more important, while a thin, light line recedes into the background. This simple drawing exercise trains you to consciously apply pressure and vary your strokes to create this visual hierarchy. By mastering line weight, you can make your drawings feel more dynamic, three-dimensional, and professional, a technique seen everywhere from comic book inking to architectural illustration.
How to Practice Line Weight and Quality
Choose Your Tool: Start with a tool that responds to pressure, like a graphite pencil (2B or softer), a brush pen, or a pressure-sensitive stylus on a digital tablet.
Practice Basic Strokes: Fill a page with simple strokes. Draw long, straight lines that transition from thin to thick and back again. Practice making curves, S-shapes, and spirals with varying pressure.
Apply to Simple Shapes: Draw basic geometric shapes like cubes, spheres, and cylinders. Use a thick line for the edges closest to the viewer and a thin line for the edges that are farther away. Use a medium weight for the internal contours.
Redraw an Existing Sketch: Take a simple sketch you have already made and trace over it, this time focusing entirely on applying a deliberate line weight hierarchy.
Tips for Success
Use Your Whole Arm: For long, confident strokes, move your entire arm from the shoulder. For smaller, detailed lines, use your wrist and fingers.
Establish a Hierarchy: A common rule is to use thick lines for foreground objects, medium lines for midground objects, and thin lines for the background.
Study the Masters: Look at the work of illustrators like Heinrich Kley or comic artists like Jack Kirby. Observe how they use line variation to create impact and form.
Experiment with Tools: Different tools create different line qualities. Practice with pens, brushes, and various pencils to understand their unique characteristics. This practice is also great for improving your overall drawing skills. For more ideas on what to draw while practicing, you can get some great hand-drawing ideas and inspirations to get started.
This exercise is essential for moving beyond basic sketching. It teaches you to use line as an expressive tool, adding a layer of sophistication and visual clarity that is crucial for any developing artist.
7. Negative Space Drawing: Seeing the Shapes in Between
Negative space drawing is a perspective-shifting exercise that trains you to see and draw the empty areas around an object rather than the object itself. This simple drawing exercise helps bypass the symbol-driven, logical side of your brain, which often distorts proportions based on preconceived ideas. By focusing on the shapes of the voids, you can capture the true scale and placement of your subject with surprising accuracy.
This technique is powerful because it forces you to observe relationships and compositions in a new way. Instead of drawing a chair, you draw the shape of the air between its legs or the space between the backrest and the seat. These abstract shapes are easier for your brain to process without judgment, leading to a more realistic and well-proportioned final drawing. It’s an essential tool for understanding how objects occupy and relate to the space they are in.
How to Practice Negative Space Drawing
Choose Your Subject: An object with interesting gaps is ideal. A houseplant, a bicycle, a stool, or a cluster of several objects make for excellent practice subjects.
Frame Your View: Look at your subject and mentally frame the composition. You can even use your hands or a small cardboard cutout to create a viewfinder. This helps you isolate the negative shapes.
Start Drawing the Voids: Identify a clear negative shape, like the triangle formed between a person's arm and their body. Place your pencil on the paper and draw that shape as if it were a solid, tangible object.
Build the Form: Continue to draw the surrounding negative shapes. As you fill them in, the "positive space" (the object itself) will emerge indirectly, defined by the boundaries of the spaces you've drawn.
Tips for Success
Use High Contrast: Place your subject in front of a plain, contrasting background. This makes the negative spaces more distinct and easier to identify.
Think in Shapes: Ignore what the object is. See only abstract shapes. Is that space a long rectangle? A weird-looking triangle? Draw what you see, not what you know.
Alternate Your Focus: Try switching between drawing the negative space and drawing the positive space (the object's contour). This can help you check your proportions and build a more complete image.
This exercise is incredibly useful when you feel stuck or when a drawing just doesn’t look right. It builds a strong sense of composition and spatial awareness, making it a valuable skill for any artist looking to improve the accuracy and balance of their work.
Simple Drawing Exercises Comparison Guide
Technique | Implementation Complexity | Resource Requirements | Expected Outcomes | Ideal Use Cases | Key Advantages |
|---|---|---|---|---|---|
Contour Line Drawing | Low - simple continuous lines | Minimal materials (pencil, paper) | Improved observation and hand-eye coordination | Quick warm-ups, foundational drawing skills | Boosts confidence, reduces perfectionism |
Gesture Drawing | Moderate - quick, expressive strokes | Pencil, paper, timer, live/reference models | Captures movement and energy | Figure drawing, animation, character design | Develops speed, understanding of form |
Basic Shape Construction | Moderate - requires 3D understanding | Pencil, paper | Better spatial reasoning and structure | Complex object and character design | Simplifies complex forms, aids proportion |
Value Studies and Shading Practice | Higher - tonal focus, careful observation | Range of pencils, blending tools, paper | Realistic rendering and form volume | Realistic drawing, painting fundamentals | Enhances light/shadow observation and depth |
Blind Drawing Exercise | Low - no paper viewing during drawing | Minimal materials | Enhanced observational skills | Creative warm-ups, breaking perfectionism | Dramatically improves focus and observation |
Line Weight and Quality Practice | Moderate - control of line variety | Various pens, pencils, brushes | Sophisticated line work and depth | Illustration, comic art, architectural drawing | Adds depth without color/shading |
Negative Space Drawing | Moderate - shifts perception focus | Minimal materials | Accurate proportions, better composition | Complex objects, furniture, landscapes | Improves spatial awareness and accuracy |
Putting It All Together: From Exercise to Art
You have now explored a powerful arsenal of simple drawing exercises, from the foundational practice of contour lines to the intuitive flow of gesture drawing. We have broken down complex subjects into basic shapes, explored the world of light and shadow through value studies, and even sharpened our observation by drawing without looking. Each drill, whether it’s focusing on negative space or refining the quality of your line weight, serves a distinct purpose in building your artistic toolkit.
The key takeaway is that these are not isolated tasks. True artistic growth happens when you begin to combine these practices. Think of them as individual notes; learning them is crucial, but creating music only happens when you string them together into a chord, a melody, a symphony. The real power of these exercises is unlocked when they cease to be rigid drills and become a natural, integrated part of your creative workflow.
Weaving Your Skills into a Cohesive Practice
To move from mechanical repetition to intuitive creation, start blending these exercises. For example, your next drawing session could look something like this:
Warm-up (5 minutes): Begin with quick gesture drawings to loosen your arm and capture the energy of your subject.
Structure (10 minutes): Build upon those gestures using basic shape construction. Break down the figure or object into spheres, cubes, and cylinders to establish a solid form.
Refinement (15 minutes): Switch to contour line drawing, using varied line weights to define the edges and add depth and interest to your sketch.
Depth (15 minutes): Finally, conduct a quick value study. Squint at your subject to identify the main areas of light and shadow, and apply simple shading to give your drawing a sense of three-dimensional reality.
By layering these simple drawing exercises, you are not just practicing skills in a vacuum; you are simulating the entire process of creating a finished piece of art, from initial idea to final rendering.
The Path Forward: Consistency Over Intensity
The most significant barrier to artistic improvement isn't a lack of talent; it's a lack of consistent practice. Committing to even 15-20 minutes of focused drawing each day will yield far greater results than a single, sporadic four-hour session once a month. This consistent effort builds muscle memory, sharpens your eye, and makes the connection between your brain, your eyes, and your hand feel effortless.
Don't let the fear of a blank page paralyze you. The exercises in this guide are your starting point. Pick one that resonates with you, or one that targets a known weakness, and dedicate a week to it. The goal isn't to create a masterpiece every time you pick up a pencil. The goal is to practice with intention. The confidence and skill you build through these foundational drills will be the bedrock upon which all your future artistic endeavors are built. The page is no longer an intimidating, empty void; it is a playground filled with limitless potential.
Now that you have the techniques, you just need the ideas. Drawing List provides endless, curated drawing prompts to help you put these simple drawing exercises into practice. Visit Drawing List to generate your next subject and turn your daily practice into a creative adventure.