Have you ever looked at a blank page and felt a mix of excitement and intimidation? The desire to create is universal, but the fear of not being "good enough" can often hold us back. The secret, however, is not about innate talent; it's about starting simple. This guide is designed to demystify the drawing process by providing a curated collection of drawings easy enough for anyone to tackle, regardless of previous experience. We believe that building confidence starts with small, achievable wins.
By exploring foundational drawing ideas, from basic shapes to simple nature elements, you will not only learn essential techniques but also discover the pure joy of bringing your imagination to life, one line at a time. This curated list provides clear, actionable steps for each subject, ensuring you can start creating immediately.
Whether your goal is to sketch for relaxation, develop a fulfilling new hobby, or lay the groundwork for more complex masterpieces, these seven starting points are your gateway. Forget the pressure to be perfect. Instead, let's focus on the simple, rewarding process of making a mark. This collection of easy drawing prompts proves that anyone can learn to draw.
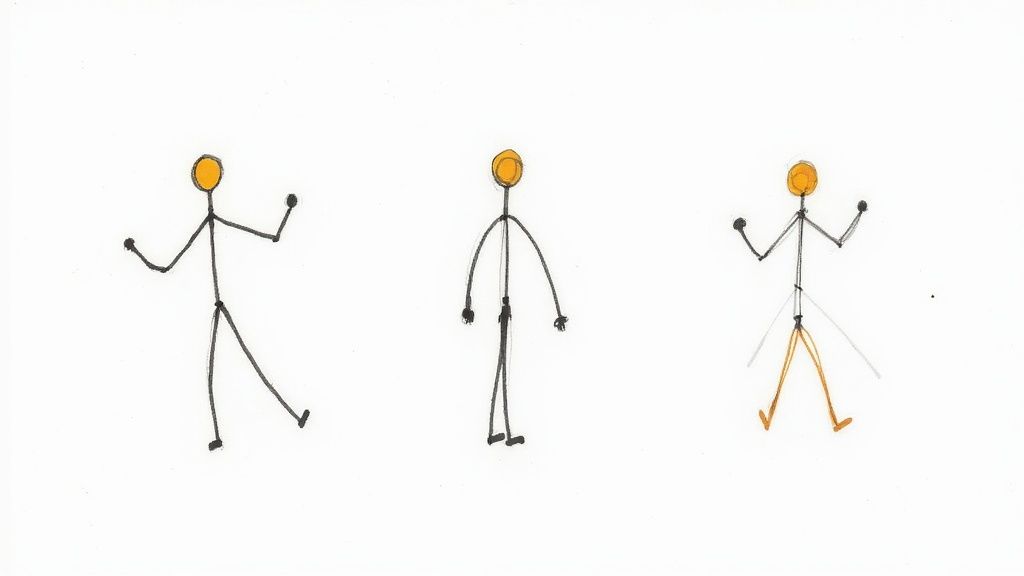
1. Stick Figures
Stick figures are the quintessential starting point for anyone learning to draw. They represent the human form in its most basic state, using simple lines for the torso and limbs, and a circle for the head. This method strips away the complexities of anatomy and perspective, allowing you to focus purely on pose, proportion, and storytelling. Because of their simplicity, stick figures are one of the most accessible and effective drawings easy for beginners to master.
This fundamental approach is more powerful than it seems. It's used in professional fields ranging from animation storyboarding to user experience (UX) design for creating quick mockups. The popular webcomic XKCD by Randall Munroe has built an entire empire on the expressive power of stick figures, proving that complexity isn't a prerequisite for compelling art.
How to Master Stick Figure Drawing
To elevate your stick figures from simple doodles to dynamic characters, focus on a few key principles. Paying attention to these small details can dramatically increase their expressive potential.
- Establish Proportions: A good rule of thumb is to make the body (from neck to crotch) roughly the same length as the legs. The arms should end around the mid-thigh. Keeping these proportions consistent will make your figures look more balanced and believable.
- Convey Emotion and Action: Don't just draw static, upright figures. Bend the knees and elbows to show movement. Tilt the head to express curiosity or sadness. Exaggerate a pose, like throwing the arms up in the air, to show joy.
- Use Line Weight: Varying the pressure of your pen or pencil can add depth. Use a thicker line for parts of the body that are closer to the viewer or to emphasize a particular action.
- Add Simple Details: You don't need detailed features to give your figure personality. Adding simple shapes for hair, a hat, or a prop like a sword can instantly provide context and character.
Pro-Tip: Think of your stick figure as a simple skeleton. Add small circles at the joints (shoulders, elbows, knees, hips) to help you visualize how the limbs bend and move. This technique is a stepping stone to more advanced gesture drawing.
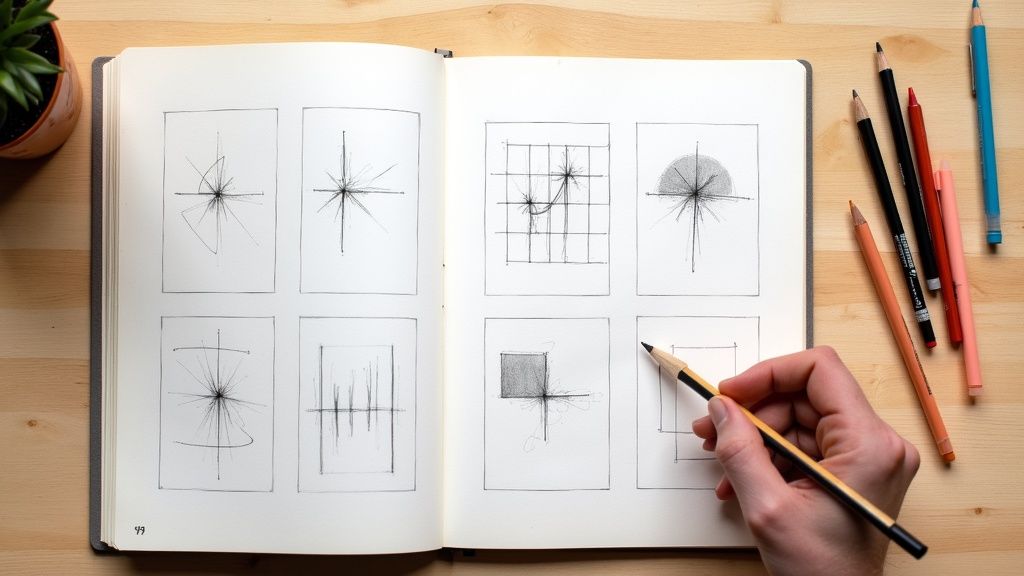
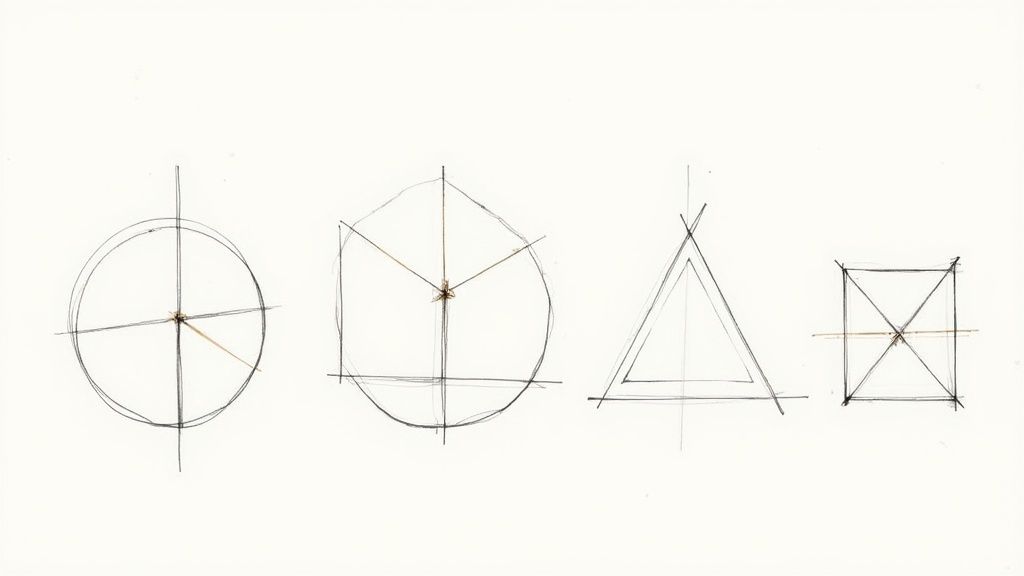
2. Basic Geometric Shapes
Mastering fundamental geometric shapes like circles, squares, and triangles is the bedrock of all complex art. These shapes act as the essential building blocks for nearly any subject you can imagine, from a simple apple to a detailed portrait. This method trains your hand-eye coordination and muscle memory, helping you develop a steady hand while teaching you to see the world in terms of basic forms. Practicing these shapes is one of the most effective ways to make future drawings easy and intuitive.
This foundational concept is not just for beginners; it’s a core principle in advanced art and design. Post-Impressionist painter Paul Cézanne famously stated his desire to "treat nature by the cylinder, the sphere, the cone." This approach of breaking down complex subjects into their geometric components is a cornerstone of traditional art education, architectural drafting, and even modern logo design, where simple, strong shapes create memorable brand identities.
How to Master Basic Geometric Shapes
To move beyond wobbly lines and develop confidence, focus on repetition and precision. These practices will build a solid foundation, allowing you to construct more sophisticated drawings with ease.
- Practice Smooth Motions: Try drawing circles and ellipses in one continuous, smooth motion without lifting your pencil. Focus on moving your entire arm from the shoulder, not just your wrist, to create cleaner, more confident curves.
- Use Light Initial Lines: Start with very light pressure to sketch your shapes. This allows you to easily erase and correct mistakes. Once you are happy with the form, you can go over it with a darker, more defined line.
- Combine Shapes into Objects: Begin constructing simple objects. A house can be a square with a triangle on top, a car can be a series of rectangles and circles, and a snowman is just three stacked spheres. This exercise helps you see the underlying structure in everything.
- Draw Through Forms: When drawing 3D shapes like cubes or cylinders, lightly sketch the lines that you wouldn't normally see (the back edges). This helps you better understand their volume and form in three-dimensional space.
Pro-Tip: Fill an entire page with one type of shape, like circles, of varying sizes. This repetitive drill, known as a "page of circles," is a classic exercise for building muscle memory and achieving control, making your lines more deliberate and accurate over time.
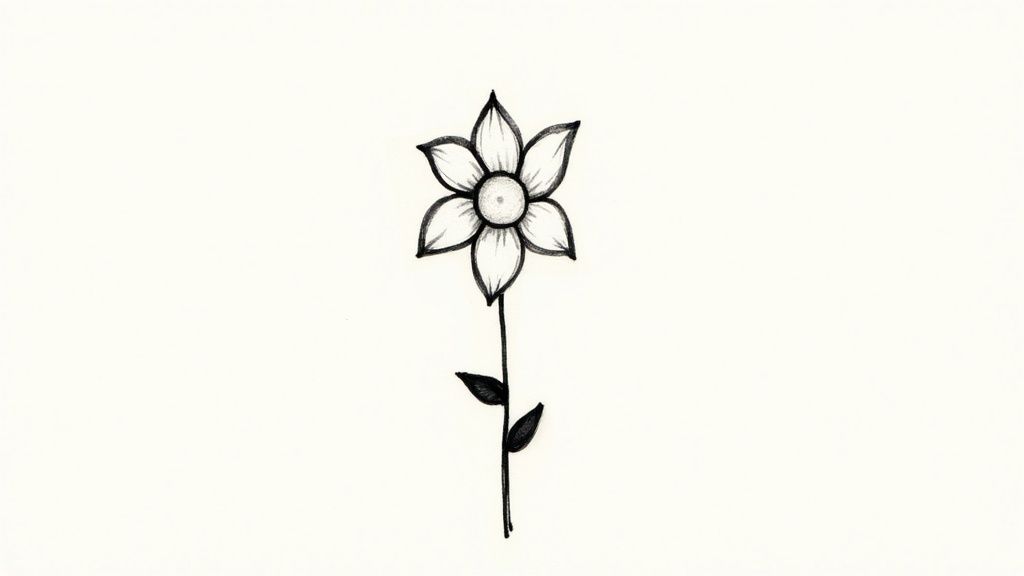
3. Simple Flowers
Drawing flowers is a classic and rewarding exercise for artists of all levels. Simple blooms are built from basic geometric shapes and gentle, organic curves, making them an ideal subject for beginners. Approaches like creating a daisy from a central circle and radiating petals, or a rose from a simple spiral, teach essential skills like symmetry, line control, and how to build complex forms from simple parts. Because they produce recognizable and beautiful results quickly, simple flowers are one of the most popular subjects for creating drawings easy.
The power of simplified floral forms is evident across the art world. Artists like Georgia O'Keeffe became famous for her large-scale, simplified flower paintings that highlight their fundamental shapes and colors. This approach is also a cornerstone of folk art traditions worldwide, minimalist Japanese art, and modern applications like greeting card design and tattoo flash sheets. Looking for more inspiration? You can explore a wide variety of flower drawing ideas to get started.
How to Master Simple Flower Drawing
To move beyond basic doodles and create flowers with life and charm, focus on a few foundational techniques. Mastering these will help you draw a whole garden of different species.
- Build from the Center Out: Always start with the center of the flower (the pistil and stamen) and work your way outward. This helps ensure your petals are proportionally and symmetrically arranged around the core.
- Use Simple Shapes as a Guide: Begin with a circle for the flower's center and ovals or teardrop shapes for the petals. For a tulip, start with a U-shape. This underlying structure makes the final drawing more coherent.
- Vary Petal Size and Shape: Nature is rarely perfect. Make your flowers look more realistic by slightly varying the size, shape, and angle of each petal. Overlapping petals also adds a fantastic sense of depth.
- Add Stems and Leaves: A flower isn't complete without its support system. Draw a gently curving line for the stem and add simple leaf shapes. Pay attention to how leaves connect to the stem to make it look more natural.
Pro-Tip: To draw a simple but elegant rose, start by drawing a loose spiral for the center. Then, build C-shaped and S-shaped curves around the spiral to form the overlapping petals. This technique captures the essence of a rose without getting lost in complex details.
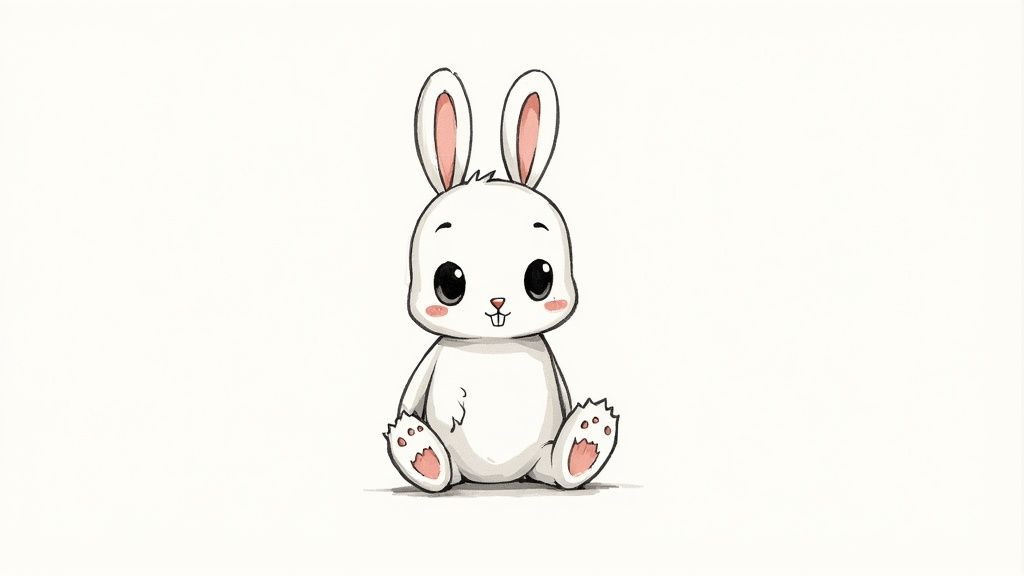
4. Cartoon Animals
Cartoon animals are a fantastic way to create expressive and lovable characters without getting bogged down by realistic anatomy. This style simplifies real animal features into approachable, friendly forms using basic shapes and exaggerated features. By focusing on personality over precision, you can make drawings easy and fun, turning complex creatures like cats, dogs, and birds into simple, memorable icons.
This approach is the foundation of modern animation and illustration, popularized by legends like Walt Disney and Chuck Jones (the mind behind Bugs Bunny and Daffy Duck). Comic strip icons such as Garfield and Snoopy demonstrate how simplified animal forms can convey deep emotion and humor. For more inspiration, you can explore a wide variety of cartoon drawing ideas that build on these principles.
How to Master Cartoon Animal Drawing
To bring your cartoon animals to life, concentrate on simplifying forms and amplifying personality. These techniques will help you create charming characters with minimal effort.
- Start with Simple Shapes: Begin your drawing with basic geometric shapes. Use a large circle for the head and a slightly smaller oval or circle for the body. This provides a solid and simple foundation to build upon.
- Exaggerate Key Features: Identify the most recognizable trait of the animal and exaggerate it. For a rabbit, this means long ears; for a mouse, big round ears and a long tail. This exaggeration is what gives cartoon animals their distinct character.
- Focus on Expressive Eyes: Eyes are the window to the soul, even for a cartoon cat. Make them large and expressive to convey emotions like surprise, happiness, or mischief. Simple dots or ovals are often all you need.
- Keep Anatomy Simple and Rounded: Use simple, curved lines for legs, tails, and other limbs. Avoid sharp angles and complex muscle definitions. Rounded shapes make characters feel softer, more friendly, and easier to draw.
Pro-Tip: Think in terms of "squash and stretch." To show movement or emotion, slightly deform your character's body. A character jumping might stretch out, while a character landing might squash down. This animation principle adds dynamism to static drawings.
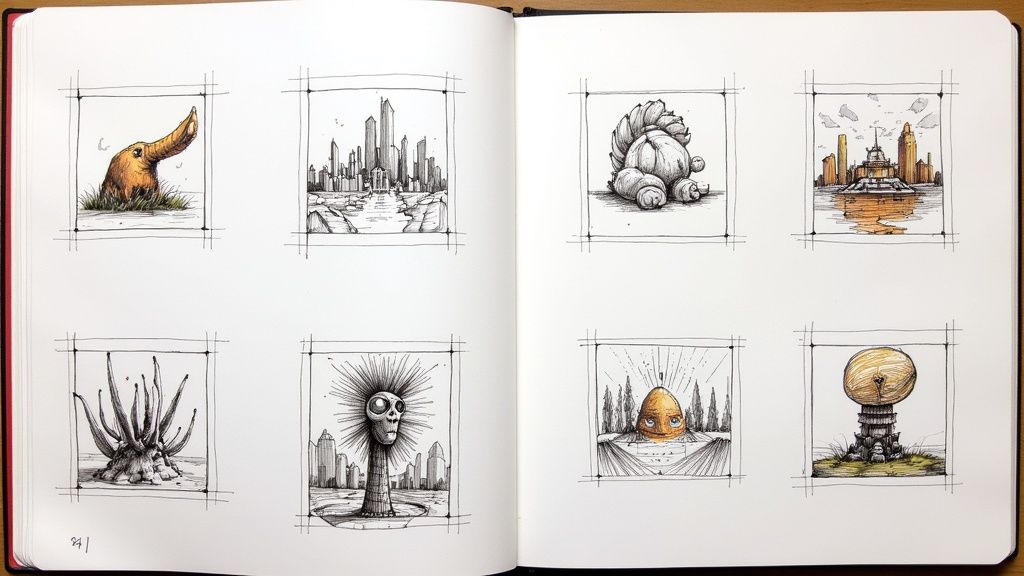
5. Houses and Buildings
Drawing houses and buildings is a fantastic way to engage with the fundamentals of structure, shape, and perspective. These subjects are built from basic geometric forms like squares for walls, rectangles for doors, and triangles for roofs. This makes architectural drawing an incredibly satisfying and manageable task for beginners, providing a clear path from simple shapes to a recognizable and complex-looking final product. Creating these structures makes drawings easy because they rely on familiar objects and logical construction.
This foundational skill is universally applicable, from the simple cottage drawings used in children's art therapy to the dynamic cityscapes seen in concept art for video games and animation. The global Urban Sketchers movement has also popularized drawing on-location architecture, demonstrating how even quick, simple sketches can capture the essence of a place. Architectural drawing teaches you to see the world in terms of shapes and lines, a crucial skill for any artist.
How to Master Drawing Houses and Buildings
Moving from a flat, one-dimensional house to a structure with depth and character involves understanding a few core architectural drawing principles.
- Start with Basic Shapes: Begin every building with its largest geometric form, usually a large square or rectangle for the main body. Add a triangle on top for a classic gabled roof. From there, place smaller rectangles for doors and windows.
- Introduce Simple Perspective: To create depth, try one-point perspective. Draw a horizontal line (the horizon) and pick a point on it (the vanishing point). Lines that move away from the viewer, like the side of the roof or a pathway, should angle toward this point. This simple trick adds instant realism.
- Build Up the Details: Small details bring a building to life. Add a chimney with a puff of smoke, a brick or wood texture on the walls, shingles on the roof, or a simple pathway leading to the door. Adding trees, bushes, and a fence can frame the house and place it in an environment.
- Vary Your Structures: When drawing a group of buildings or a cityscape, avoid making them all the same height and width. Vary the roof styles, window placements, and overall shapes to create a more dynamic and interesting composition.
Pro-Tip: Use a ruler when you're starting out to keep your lines straight and your angles sharp. As you gain confidence, try drawing freehand to develop a looser, more expressive style common in urban sketching. This transition helps build your hand-eye coordination.
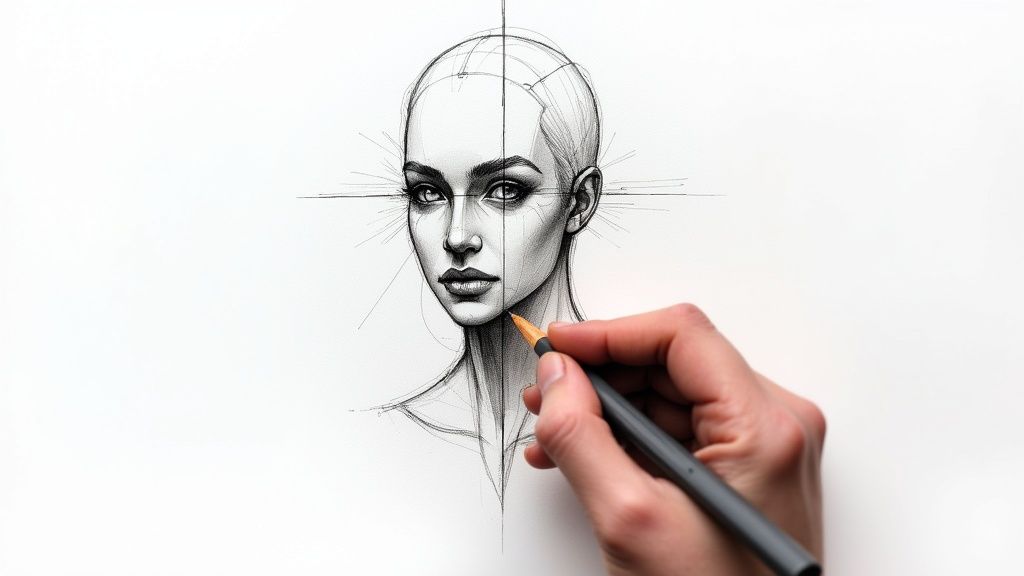
6. Eyes and Facial Features
Drawing individual facial features, particularly eyes, provides focused practice on the most expressive elements of a portrait. This approach breaks down the overwhelming task of drawing a full face into manageable parts. By isolating features like eyes, noses, or mouths, you can concentrate on shape, shading, and detail without worrying about overall facial structure, making it one of the most effective drawings easy for building foundational skills.
This method of deconstruction is a cornerstone of classical art training, where students spend hours sketching isolated features before attempting a full portrait. It’s also vital in fields like character design for animation, where a character's entire personality can be conveyed through the shape of their eyes. Even forensic artists begin by mastering individual features to construct accurate composite sketches.
How to Master Drawing Eyes and Facial Features
Focusing on a few fundamental techniques will help you draw realistic and expressive features, building your confidence for more complex portrait work.
- Start with the Basic Eye Shape: Begin with a simple almond or lemon shape for the eye. The inner corner is typically rounder, while the outer corner is more pointed. This basic outline serves as the container for all other details.
- Position the Iris and Pupil: Draw the iris as a perfect circle, but remember it's usually partially covered by the top and sometimes the bottom eyelid. The pupil sits in the center of the iris. Don't make the common mistake of drawing a full circle floating in the white of the eye; this creates a surprised or scared expression.
- Add a Highlight for Life: The single most important detail for making an eye look alive is the highlight, or catchlight. This is the small reflection of a light source on the eye's surface. Place it as a small, clean shape (circle or square) on the iris and pupil.
- Remember Key Proportions: A fundamental rule of facial anatomy is that the space between the two eyes is roughly equal to the width of one eye. Keeping this proportion in mind will help you place features correctly when you eventually combine them.
Pro-Tip: Use your own face as a reference. Sit in front of a mirror and study your eyes, nose, and mouth. Observe how they change when you make different expressions and how light creates shadows and highlights. This direct observation is one of the fastest ways to learn.
7. Trees and Nature Elements
Drawing trees and other elements from nature is a wonderfully therapeutic and accessible way to practice art. From the simple "lollipop" tree of childhood sketches to more detailed depictions of specific species, these subjects teach fundamental skills in creating organic shapes, developing texture, and recognizing natural patterns. Because they are forgiving subjects with endless variation, trees are fantastic drawings easy for building confidence and observation skills.
The practice of simplifying nature is celebrated across many art forms. Bob Ross famously demonstrated how to create "happy little trees" with a few simple brushstrokes, making landscape art feel achievable for millions. Similarly, traditional Japanese sumi-e ink painting captures the essence of a bamboo stalk or pine tree with minimal, elegant lines. This focus on form and texture over perfect realism makes nature an ideal subject for beginners.
How to Master Drawing Trees and Nature
To take your nature sketches from basic outlines to lively illustrations, concentrate on a few core techniques. These methods will help you capture the unique character and texture of the natural world.
- Build from the Ground Up: Start with the trunk. Make it wider at the base where it meets the ground and have it taper as it goes up. Then, add the main branches, ensuring they also get thinner as they extend away from the trunk.
- Think in Layers: Add smaller branches extending from the larger ones. Avoid making them perfectly straight; natural branches have slight bends and twists. This hierarchical structure creates a believable framework for your tree.
- Create Foliage with Texture: Instead of drawing individual leaves, use scribbling, stippling (dots), or looping motions to suggest a mass of foliage. Varying the density of these marks can create areas of light and shadow within the canopy. These are some of the most popular drawing ideas for kids because of their simplicity.
- Observe Real Patterns: Look at actual trees. Notice how an oak's branches are gnarled and thick, while a birch's are slender and graceful. Observing these details will bring authenticity to your drawings and improve your ability to see as an artist.
Pro-Tip: Don't just draw the tree, draw the space around it. Paying attention to the "negative space" between the branches will help you define their shapes more accurately and create a more balanced composition. This is a classic artist's trick for improving accuracy.
7 Easy Drawing Types Comparison
Item | Implementation Complexity | Resource Requirements | Expected Outcomes | Ideal Use Cases | Key Advantages |
|---|---|---|---|---|---|
Stick Figures | Very low | Minimal (pen/pencil, paper) | Basic human form representation | Absolute beginners, quick sketches | Universal understanding, fast execution |
Basic Geometric Shapes | Low | Minimal (pen/pencil, paper) | Improved hand control and form awareness | Beginners practicing drawing basics | Builds muscle memory, foundation for complex art |
Simple Flowers | Low to moderate | Minimal | Recognizable organic shapes | Beginners learning curves and symmetry | Immediate pleasing results, creativity scope |
Cartoon Animals | Moderate | Basic drawing tools | Expressive, simplified animal characters | Beginner to intermediate animators | Fun, personality focus, broad appeal |
Houses and Buildings | Moderate | Basic tools, ruler optional | Simple architectural forms | Beginners interested in perspective | Teaches perspective, spatial skills |
Eyes and Facial Features | Moderate to high | Basic tools | Detailed facial feature studies | Portrait beginners/intermediate artists | Develops observation, expression skills |
Trees and Nature Elements | Moderate | Basic tools | Organic nature shapes and textures | Beginners to intermediate in landscapes | Connects drawing with nature, texture practice |
Your Creative Journey Continues
You have just navigated a comprehensive guide filled with accessible ideas for drawings easy enough for anyone to tackle. We've journeyed from the foundational simplicity of stick figures and geometric shapes to the expressive details of facial features and the organic forms of nature. Each of these seven categories serves as more than just a prompt; they are fundamental building blocks for your artistic development. The core takeaway is that complexity in art is built from simplicity. A detailed portrait starts with simple ovals and lines, just as a lush forest scene begins with basic tree trunks and leaf shapes.
The true value of these exercises lies not in creating a flawless masterpiece on your first attempt, but in the consistent act of practice. Every line you sketch, no matter how wobbly or imperfect, is a victory. It represents a commitment to your creative growth, strengthening the crucial connection between your eyes, your brain, and your hand. This consistent effort is what transforms a hesitant beginner into a confident artist.
Turning Practice into Progress
To truly benefit from the concepts we've covered, it is vital to integrate them into a regular creative habit. Don't let this newfound inspiration fade. Instead, channel it into actionable steps that will solidify your skills and keep your momentum going.
- The 15-Minute Daily Sketch: Dedicate just fifteen minutes each day to drawing. Use the ideas from this article as your starting point. One day, focus on filling a page with different cartoon animal faces. The next, practice drawing eyes with various expressions. This small, consistent commitment is far more effective than a single, long session once a month.
- Combine and Create: Now that you have a toolkit of simple elements, start combining them. Draw a stick figure holding a simple flower, standing next to a house made of geometric shapes. This practice of creating small scenes helps you think about composition and storytelling, taking your drawings easy from isolated objects to integrated creations.
- Embrace the "Ugly" Sketchbook: Let go of the pressure for perfection. Your sketchbook is a playground, not a gallery. Allow it to be messy. Fill its pages with quick, experimental drawings. This freedom is where real learning and discovery happen.
By mastering these simple forms, you are not just learning to draw a tree; you are learning the principles of line, shape, and texture that apply to everything you will ever create. You are building a visual vocabulary that will empower you to translate the world around you, and the ideas within you, onto the page. Your journey is a continuous loop of learning, practicing, and creating. Keep your pencil moving, stay curious, and remember that every artist you admire started exactly where you are now: with a simple line.
Ready to move beyond this list and discover an endless well of inspiration? If you're looking for thousands of fresh prompts for drawings easy and challenging, check out the idea generators at Drawing List. Visit Drawing List to find your next creative spark and keep your artistic journey moving forward.