Welcome to the world of charcoal. If you've ever felt intimidated by a blank piece of paper, you're in the right place. Charcoal isn't just another art supply; it’s a wonderfully expressive and forgiving medium, making it a fantastic starting point for anyone new to drawing. Its blendable nature means mistakes aren’t just easily corrected—they often turn into what we call happy accidents.
Why Start Your Art Journey with Charcoal?
If you’re hesitant to make that first mark, charcoal can be the key to unlocking your confidence. Unlike the unforgiving precision of pen or the sometimes-timid nature of pencil, charcoal encourages bold, expressive movements and a more intuitive approach to creating art.
There’s a good reason so many artists start here. In fact, surveys show that around 70% of art students begin their drawing practice with charcoal. It’s brilliant for learning to handle everything from fine, delicate lines to broad, dramatic shading. The ease of erasing and smudging invites you to experiment freely, which is why it has remained a cornerstone of art education for so long. You can dig deeper into its rich history and various applications at visual-arts-cork.com.
Embrace the Forgiving Nature of Charcoal
One of charcoal’s biggest draws for beginners is how incredibly forgiving it is. Made a line in the wrong spot? No problem. A quick swipe with a cloth or a dab with a kneaded eraser can lift it right off the page. This freedom turns the initial learning process into one of exploration rather than a stressful quest for perfection.
As artist Asiah Thomas-Mandlman puts it, “Charcoal is my dream. She’s messy, sexy and sincere. For a 2D material, charcoal is extremely moldable and forgiving.”
This "moldable" quality is what she's talking about. You can add, subtract, and push the material around directly on the paper, almost like you're sculpting with dust. This hands-on process is an amazing way to get a feel for core artistic concepts, such as:
- Value: Understanding how to create a full range of tones, from the deepest blacks to the brightest whites.
- Form: Seeing firsthand how light and shadow work together to give objects a three-dimensional feel.
- Composition: Learning to arrange the elements in your drawing for the strongest visual impact.
Ultimately, starting with charcoal helps dissolve the fear that can hold new artists back. It empowers you to create dramatic, high-contrast pieces right from the get-go, giving you that satisfying sense of accomplishment that will fuel your desire to keep creating. To get your own creative sparks flying, take a look at our collection of charcoal drawing ideas and see just what's possible with this incredible medium.
Choosing Your Essential Charcoal Drawing Tools
Walking into an art store can feel overwhelming. There are so many options, but the truth is, you only need a handful of key items for a fantastic charcoal drawing for beginners kit. Don't worry about the wall of supplies. By focusing on the essentials, you can jump right into creating without a huge investment.
Starting with the Right Charcoal
Your first big decision is the charcoal itself. You'll mainly see two types on the shelves: vine and compressed. They look similar, but they behave in completely different ways. Understanding their unique personalities is key to getting the results you want.
Choosing Your First Charcoal Set
Charcoal Type | Best For | Characteristics |
|---|---|---|
Vine Charcoal | Sketching, blocking in large shapes, light tones | Soft, dusty, and easy to erase. Made from burned willow twigs, it creates a light gray mark. |
Compressed Charcoal | Final details, dark shadows, crisp lines | Dense, dark, and difficult to erase. Made of powdered charcoal and a binder, it delivers rich, velvety blacks. |
Most artists I know use both, often in the same piece. A good starter set will include a mix, allowing you to build up your drawing from soft, subtle sketches to bold, final statements.
My Advice: Think of it like building a house. Vine charcoal is your blueprint—light, forgiving, and easy to change. Compressed charcoal is the permanent foundation and framework you build on top.
Finding the Perfect Paper and Eraser
Your paper choice is just as important as your charcoal. You're looking for paper with some texture, what artists call "tooth." This texture grabs the charcoal particles and holds them in place. Steer clear of smooth copy paper; your charcoal will just slide right off.
Look for a drawing pad specifically labeled for charcoal or pastels. A paper weight somewhere in the 60-90 lb range is a great starting point.
Finally, let's talk about erasers. A kneaded eraser isn't just for fixing mistakes—it’s a powerful drawing tool. You can mold this soft, gummy eraser into a fine point to lift out tiny highlights or flatten it to pull up larger areas of tone. This is a core technique in charcoal called subtractive drawing. It's an absolute must-have in your kit.
Finding Your Flow with Mark Making
Alright, this is where the real fun begins. Let's get our hands dirty and move past the theory. The true character of charcoal comes alive in how you handle it, not just what you draw. Think of it as a dance between your hand and the paper.
How you hold the charcoal changes everything. If you grip it like a pencil, using the tip, you'll get those crisp, clean lines perfect for sketching out a composition or adding sharp details. But the magic happens when you break that habit. Turn the charcoal stick on its side and you can lay down these beautiful, broad strokes. This is your go-to move for blocking in large areas of shadow and tone.
Learn the Ropes Through Playful Practice
Forget about stuffy, rigid exercises. The quickest way to get comfortable with charcoal is to simply play with it. Before you even think about starting a proper drawing, grab a scrap piece of paper and just explore. This isn't about making a perfect drawing; it's about getting a feel for the material and building that all-important muscle memory.
Give these warm-ups a try to see what your charcoal is capable of:
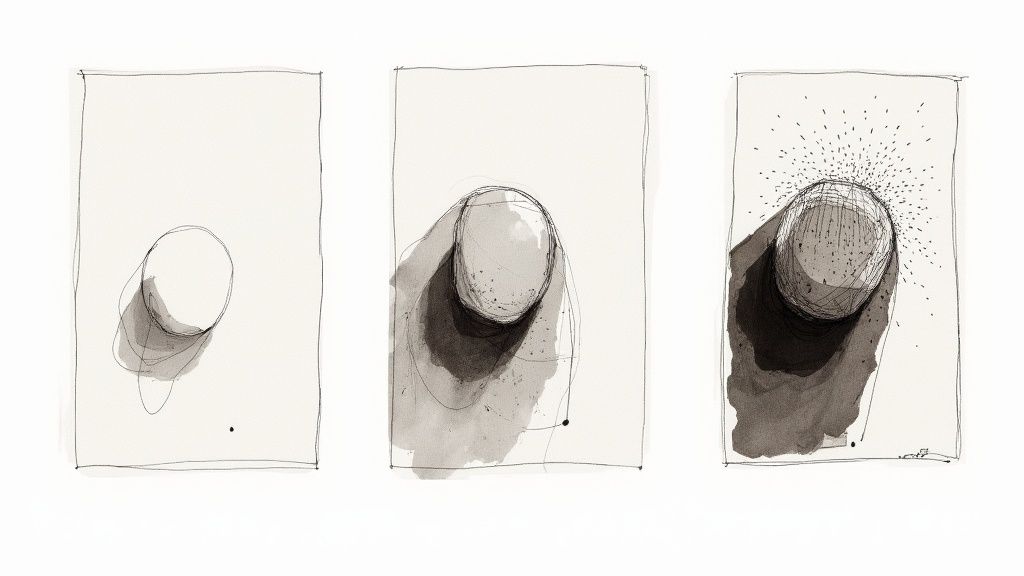
- Pressure Practice: Draw a simple line, starting with the lightest touch you can manage. Gradually increase the pressure as you move across the page until you get the richest, darkest black possible.
- Texture Time: Use different parts of the stick to create textures. Make parallel lines (hatching), then cross them over (cross-hatching). Try some random, energetic scribbles. See what happens!
- The Side Swipe: Lay the charcoal on its side and make wide, sweeping marks. Pay attention to how the angle of your hand changes the stroke's width and softness.
This isn't about perfection. It's about developing an intuition for the medium. Every mark you make, "good" or "bad," is a lesson that prepares you for your actual artwork.
These warm-ups are your training ground for understanding value—the relationship between light and dark—which is the secret to creating depth and realism. Once you’re comfortable making a range of marks, you’ll feel much more confident tackling a real subject.
When you're ready for that next step, take a look at our list of beginner drawing ideas to find some inspiration for your first piece.
Bringing Your Drawings to Life with Shading
Shading is what breathes life into a flat sketch, transforming it into something that feels tangible and three-dimensional. It's the skill that makes your subjects feel like they have weight and occupy real space. The secret lies in mastering your values—the subtle shifts from the palest grays all the way to a deep, velvety black.
Don't let that intimidate you. Charcoal is an incredibly forgiving medium for creating these soft transitions, which artists call gradients. You can certainly get different effects by changing how hard you press, but the real magic happens when you start blending. Once you've laid down some charcoal, you can physically move it around on the paper's surface to soften lines, smooth out tones, and build a sense of atmosphere.
Mastering Blending Techniques
With charcoal, blending is a very tactile, hands-on process. You'll find that every tool creates a unique texture and effect, so part of the fun is just playing around to discover what works for you.
Here are a few of the go-to blending tools you'll see on almost any charcoal artist's desk:
- Your Fingers: Honestly, this is the most direct tool you have. The natural oils on your skin are fantastic for creating beautifully soft, smooth blends. Just be mindful—it's easy to get carried away and smudge your drawing into a muddy mess.
- A Cloth or Paper Towel: When you need to blend a large area, like a sky or a background, grabbing a piece of an old t-shirt or a paper towel is your best bet. This technique produces soft, hazy effects without leaving any fingerprints behind.
- Blending Stumps & Tortillons: These are absolute must-haves. They're just tightly rolled paper sticks, but they give you incredible control. Because they come to a point, they're perfect for working in small, precise areas and creating crisp, clean gradients without getting your hands dirty.
Shading isn’t just about adding darkness; it’s about sculpting with light. You're using shadow to show how light falls across an object, revealing its form, curves, and texture.
Unlocking Highlights with Subtractive Drawing
Here’s where things get really exciting. One of the most powerful techniques in charcoal is subtractive drawing, which is a fancy way of saying you use your eraser as a drawing tool. Instead of just cleaning up mistakes, you're actively pulling charcoal off the paper to carve out highlights and define sharp edges.
This is where your kneaded eraser truly shines. You can pinch it into a fine point to lift out a tiny, bright highlight—think of the glint in an eye or the shine on a wet surface. Or, flatten it out to gently lift a broader, softer patch of light.
This push-and-pull between adding and removing charcoal is what gives drawings that signature dramatic contrast and energy. For any beginner, learning to "draw" with an eraser is a complete game-changer.
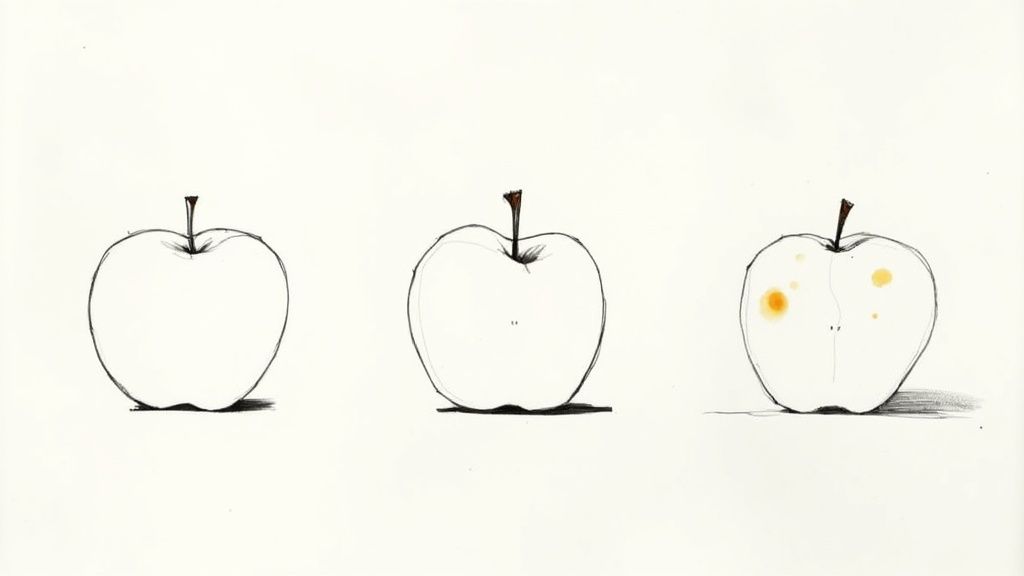
Your First Project: Drawing a Simple Pear
Alright, let's put all that practice into action and create a finished piece. We're going to draw a pear. It might sound cliché, but there's a good reason it's a classic subject for beginners. Its simple, organic shape is perfect for getting a handle on form and shading without feeling overwhelmed.
Think of this pear not as your grand masterpiece, but as your first real conversation with charcoal. It’s a low-pressure way to see how your outlines, shading, blending, and highlights all come together on the page.
Setting Up Your Subject
First things first: grab a pear. Place it on a table or surface and point a single, strong light at it—a desk lamp is perfect. What you're trying to do is create obvious, dramatic shadows.
Take a moment to just look. See where the light hits the pear most intensely? That's your highlight. Now, find the darkest part of the shadow on the pear itself (that's the core shadow) and the shadow it casts on the surface below (the cast shadow). These are your landmarks for the entire drawing.
Now, lightly sketch the basic shape of the pear using your softest vine charcoal. Don't grip it like a pencil; hold it loosely and use the side of the stick. This keeps your lines faint and easy to change. Focus on the general shape, not a perfect outline.
Building Form with Light and Shadow
With your basic outline in place, it's time to establish your shadows. Switch over to your compressed charcoal and gently block in the darkest areas—the core shadow on the pear and that cast shadow on the table. This simple step immediately tells the viewer where your light is coming from and starts making the pear look three-dimensional.
From here, you'll start building up the different values. Add more layers of compressed charcoal to make the darkest parts even darker. Then, grab your blending stump to soften the edges and create a smooth transition from the deep core shadow into the lighter mid-tones. Keep thinking about how the pear's surface curves away from your light source.
The real magic moment for any beginner is when the object on the page suddenly starts to feel solid and real. This happens when you stop thinking in lines and start seeing how the planes of light and shadow work together to create form.
The final touch is to bring in the highlights. Take your kneaded eraser and pinch it to a point or a sharp edge. Use it to gently lift the charcoal right off the paper where the light is hitting the pear most directly. This "subtractive" drawing technique creates that bright pop that makes your pear look truly round.
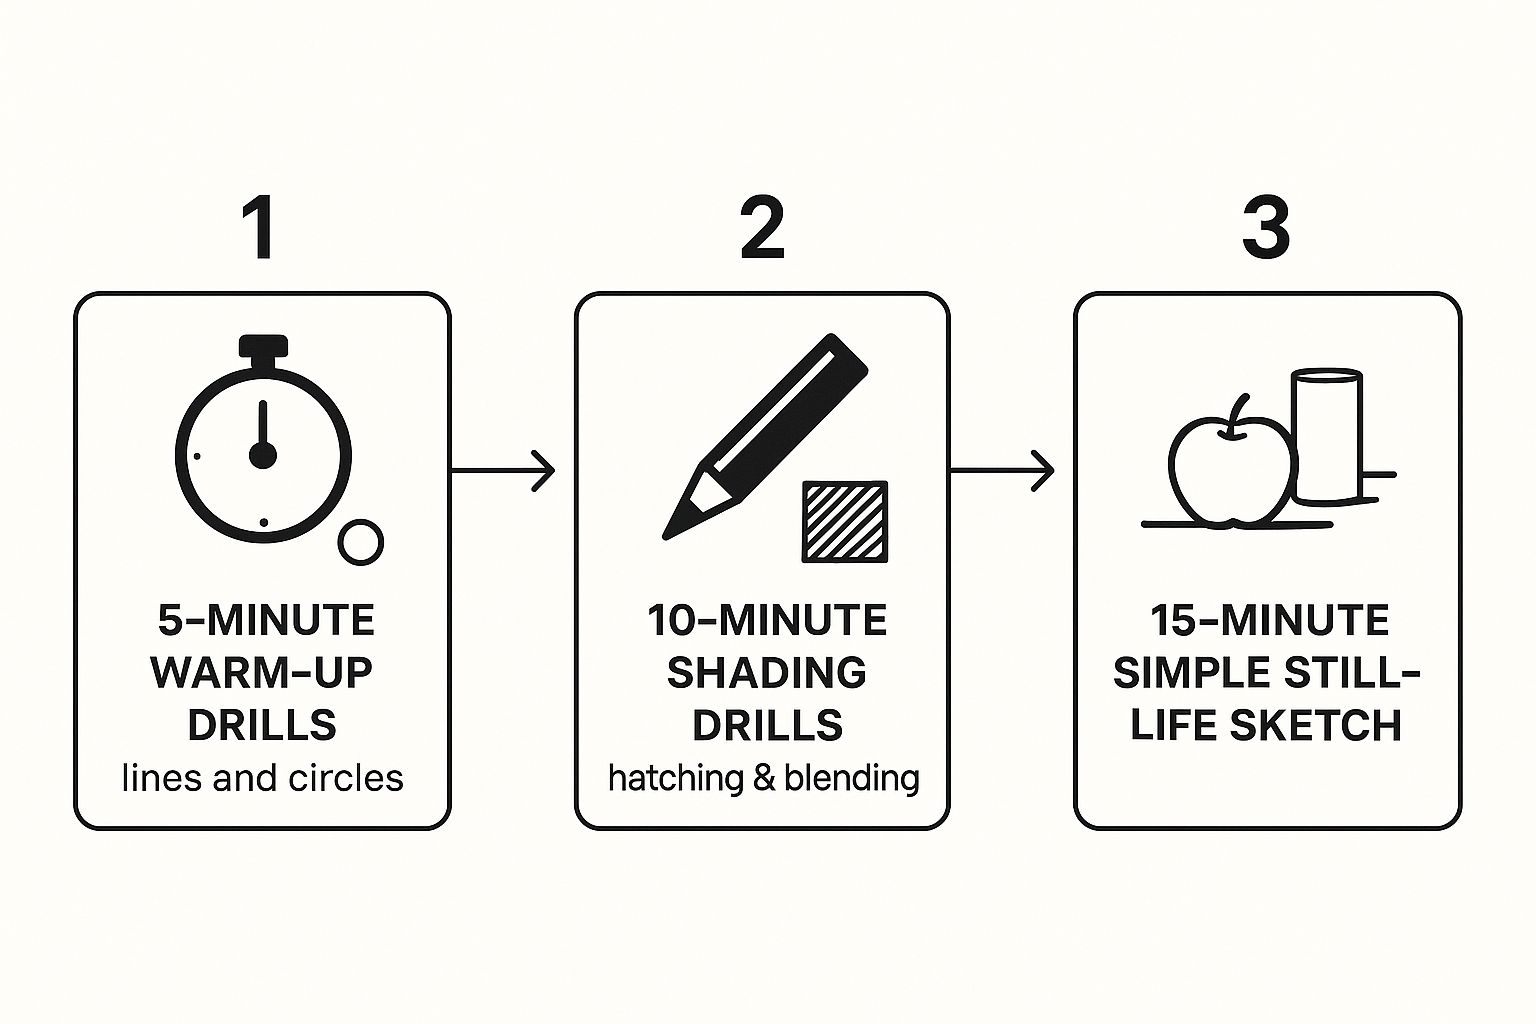
This process isn't just for pears, either. It’s a repeatable framework you can use for just about any subject. Structuring your practice this way—with warm-ups, drills, and simple projects—is the fastest way to build both confidence and muscle memory.
Keeping Your Charcoal Drawings Safe
So you’ve finished a piece you’re proud of. That's a fantastic feeling! But with charcoal, your work isn't truly done until you've protected it. This medium is notoriously dusty and will smudge at the slightest touch, so making sure your art lasts is a crucial final step.
The go-to solution is a fixative spray. It’s essentially a transparent sealant that locks the loose charcoal dust onto the paper, preventing it from smearing or flaking away. Artists have been tackling this problem for centuries; even back in the Renaissance, they used things like gum baths to preserve their sketches. You can dive deeper into the history of charcoal art preservation on Wikipedia).
How to Use a Fixative Spray
Applying fixative can be nerve-wracking the first time, but it's easy once you get the hang of it.
First, prop your artwork up vertically. Holding the can about 12 inches away, spray in a steady, sweeping motion from side to side. Start spraying just off the edge of the paper and continue past the other side. This ensures you get even coverage without any heavy spots.
It's always better to apply two thin layers, letting the first dry completely before adding the second, rather than one thick, drippy coat.
My Pro Tip: Always, always do a test spray on a scrap piece of paper first. This clears the nozzle of any clogs and lets you check the spray pattern before you point it at your finished drawing. It’s a simple step that has saved me from disaster more than once.
If you aren't framing your work right away, you'll need a good way to store it. The best thing I've found is glassine paper. It's an inexpensive, acid-free paper that acts as a perfect barrier. Just lay a sheet over your drawing before sliding it into a portfolio or folder. This stops any friction from smudging your hard work.
Now that you know how to protect your art, you're ready to create more. For your next piece, check out these easy drawing ideas for beginners and keep practicing
Got Questions? We've Got Answers
Every artist, no matter how seasoned, started with a list of questions. It's just part of the process. So, let's tackle a couple of the big ones that trip up almost everyone when they first start their journey with charcoal.
What’s the Right Paper for Charcoal?
The paper you choose makes a huge difference. You'll want something with a bit of texture—what artists call "tooth." This texture is what grabs and holds onto the charcoal particles. Smooth paper, like what's in your printer, just won't cut it; the charcoal will slide right off.
Look for paper pads specifically made for charcoal or pastels. Brands like Canson Mi-Teintes or the Strathmore 400 Series are fantastic and widely available. They have that perfect amount of grit to really make your drawings pop.
A Game-Changing Tip: Try working on toned paper, like a mid-tone gray or tan. This is a classic technique for a reason. It gives you a neutral starting point, allowing you to build up your dark shadows with charcoal and then add brilliant highlights with white chalk. It instantly adds depth to your work.
How Can I Stop Smudging Everything?
Ah, the classic charcoal problem. Smudging is inevitable to some degree, but you can definitely manage it. The key is to be strategic about how you work.
- Work from top to bottom. This way, your hand isn't constantly resting on areas you've already drawn.
- Think about your dominant hand. If you’re right-handed, try to work from the left side of the page to the right. If you're a lefty, do the opposite.
- Use a barrier. This is my favorite trick. Just place a clean, spare sheet of paper under your drawing hand. It acts as a shield, letting you rest your hand on the drawing without creating a smudgy mess.