Before you can dive into learning how to draw, you need to get your hands on a few basic supplies. Don't worry, you won't need to break the bank. All it really takes to get started is a handful of good graphite pencils, a decent sketchbook, and a reliable eraser. That's it. This small setup is more than enough to begin your journey with confidence.
Your First Sketch: The Essential Toolkit

It’s easy to get carried away at the art supply store, but honestly, starting with too much gear can be more confusing than helpful. A better approach is to keep it simple with a few quality, versatile items. This way, you can put all your focus where it belongs: on the drawing itself.
Getting a Feel for Graphite
The graphite pencil is the heart of any artist's toolkit, but not all pencils are created equal. The real magic lies in understanding pencil grades, which tell you how hard or soft the graphite core is. This directly affects how light, dark, thick, or thin your lines will be.
Pencil grades run on a spectrum. "H" pencils have a harder graphite core, which produces light, crisp lines—perfect for those initial, barely-there sketches. On the other end, "B" pencils have a much softer core, leaving darker, richer marks that are fantastic for shading and building up deep shadows.
You don't need a massive 24-piece set to start. In fact, just three pencils will cover most of your bases:
- An HB Pencil: Think of this as your jack-of-all-trades. It's the standard #2 pencil you're already familiar with and is perfect for general-purpose sketching.
- A 2B Pencil: This one is a bit softer, giving you darker lines and nice mid-tones without smudging too easily. It’s a workhorse for shading.
- A 4B Pencil: When you need to lay down some serious darks for deep shadows and contrast, the 4B is your go-to.
This simple trio gives you a surprisingly wide range of values to work with. The demand for these fundamental tools is huge; the global drawing pencil market was valued at an incredible USD 15,950 million in 2023 and continues to grow. This just shows how many people are picking up a pencil and discovering the joy of drawing.
To help you visualize the differences, here's a quick breakdown of the most common pencil grades you'll encounter.
Essential Drawing Pencils for Beginners
Pencil Grade | Hardness | Best Use for Beginners | Example |
|---|---|---|---|
2H | Hard | Light, faint initial sketches and technical outlines. | Laying out the basic structure of a face without leaving heavy lines. |
HB | Medium | All-purpose sketching and writing. The perfect starting point. | Doodling ideas or creating a balanced line drawing. |
2B | Soft | Shading, mid-tones, and creating darker, more expressive lines. | Adding shadows to a piece of fruit or darkening an outline. |
4B / 6B | Very Soft | Deep, dark shading, creating strong contrast, and rich textures. | Filling in the darkest areas of a drawing, like a pupil or a shadow. |
Having a few of these on hand will give you the flexibility to experiment with line weight and value right from the start.
Your Sketchbook and Eraser
Your sketchbook is your personal playground—a place to practice, make mistakes, and watch your skills grow. Look for one with paper that's at least 70-80 lb in weight. This will keep your erasing from tearing through the page.
And speaking of erasing, a good eraser is a creative tool, not just a way to fix mistakes. A kneaded eraser is brilliant because you can mold it to any shape and use it to lift graphite off the paper, creating subtle highlights. A classic vinyl eraser, on the other hand, is great for cleanly removing lines without smudging your work.
With these few items in your bag, you're all set. If you're wondering what to draw first, check out our guide filled with easy drawing ideas for beginners to get the creative juices flowing.
Learning to See and Draw With Line
Every great drawing starts with a single line. But getting that line to do what you want? That's the real trick. One of the first major hurdles for any beginner is moving past the habit of just tracing outlines. The real goal is to learn the language of line—how to make a simple mark express form, weight, and even movement.
Think about it. A light, delicate line can suggest the softness of a cloud or a piece of silk. A thick, heavy line gives a sense of solidity, like the edge of a stone building. This technique, called varying your line weight, is your first step toward making drawings that feel dynamic and real.
Training Your Hand and Eye
So, how do you build this skill? The classic exercise, and one I always recommend, is contour drawing. The name comes from the French word for "outline," but it's much more than that. It's a method designed to make you slow down and truly see what's in front of you, rather than drawing what your brain thinks is there.
The secret to contour drawing is synchronizing your hand with your eye. You're learning to let go of your preconceived ideas about an object and instead focus purely on observation. It’s a foundational skill that will improve everything you draw from here on out.
Start with something simple. Your non-drawing hand is perfect, or maybe a piece of fruit on your desk. The challenge is to draw all the edges and outlines you see without lifting your pencil from the paper. This is what we call a continuous line contour.
Putting Contour Drawing Into Practice
Let's be honest: your first few attempts at this will probably look a little strange. The proportions might be off, and the lines might be wobbly. That’s not just okay—it's expected. It means you're building new connections between what your eyes see and what your hand does.
Here are a few tips to get the most out of the exercise:
- Look at Your Subject, Not Your Paper: Try to spend about 80% of your time looking at the object and only 20% glancing at your drawing. This forces you to trust your hand.
- Go Slow: Imagine your eye is a tiny ant crawling along every edge and curve of the object. Your pencil should move at that same slow, deliberate pace.
- Embrace the "Wrong" Drawings: The point isn't a perfect replica. It's about the process of observation. Let it be messy.
Once you’ve done this a few times, you'll start to feel more comfortable. When you're ready for new subjects, you can find tons of simple and easy drawing ideas that are perfect for practicing your line work.
Stick with it, and you'll notice your lines becoming more confident and expressive. You’ll begin to understand how a single line can wrap around a form, describe a texture, and even hint at motion. This is the moment your drawings truly start to come to life.
Adding Depth and Form with Shading

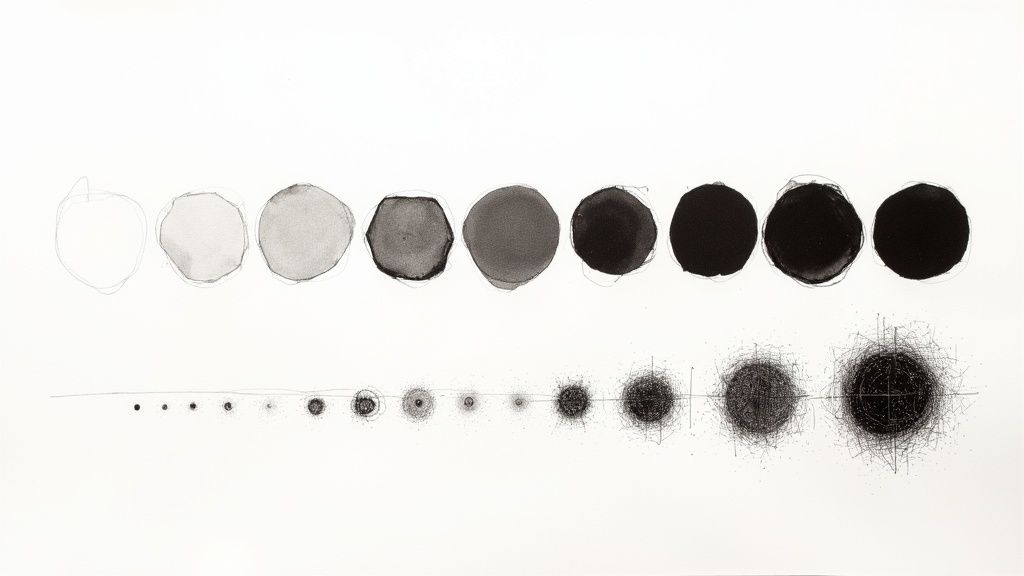
If confident lines create the skeleton of your drawing, shading is what gives it flesh and muscle. This is where your art truly comes alive, transforming flat shapes into objects with presence and weight. It's the magic that turns a simple circle into a sphere that feels like it could roll right off the page.
Shading is really all about value—the range of light to dark tones. When you get a handle on creating and placing these values, you can convincingly show how light wraps around an object, giving it believable form and a genuine sense of realism.
It All Starts With a Light Source
Before you make a single mark, you have to ask yourself one question: where is the light coming from? This isn't just a minor detail; it's the foundation of your entire shading strategy. The location of your light source dictates where every highlight and shadow will fall.
Imagine an apple sitting on a table with a single lamp shining on it. The side facing the lamp will catch the most light, creating a bright highlight. The side turned away from the light will be the darkest part, known as the core shadow. And don't forget the cast shadow—the dark shape the apple throws onto the table's surface.
Key takeaway: Light and shadow are a team. One can't exist without the other. Nailing down your light source isn't optional—it's the first and most critical step for any drawing with depth.
To get a feel for this, try setting up a simple still life. Just grab a desk lamp and aim it at something basic like a mug or even an egg. Before you even touch a pencil, just sit and observe. See how the light creates distinct areas of brightness and shadow. This quiet observation is just as crucial as the physical act of drawing.
Core Shading Techniques to Master
Once you understand the logic of light, you can start applying those values. There's no single "right" way to shade; different techniques produce wildly different textures and moods.
Here are a few foundational methods every artist should have in their back pocket:
- Hatching: This is simply drawing a series of parallel lines. The closer together you place them, the darker the value becomes. It's fantastic for creating a clean, controlled look.
- Cross-Hatching: Think of this as a layered approach. You start with hatching, then add another set of lines going in a different direction. It’s an incredibly effective way to build up deep, rich shadows.
- Blending/Smudging: For smooth, soft transitions, this is your go-to. Lay down some graphite with a soft pencil (a 4B is perfect for this) and then gently smudge it with your finger, a paper stump (also called a tortillon), or even a cotton swab.
Drawing with graphite pencils is the classic starting point for a reason. Many experts recommend beginners first get comfortable with different pencil grades and how to control their strokes before exploring other mediums. A basic set of pencils, from a hard 2H for light sketches to a soft 4B for darks, gives you everything you need. You can learn more about the basics of drawing with graphite on ArtistsNetwork.com.
Putting It All Together on Simple Shapes
The absolute best way to practice is by applying these techniques to basic geometric forms. Seriously, don't skip this part!
Start with a sphere. Sketch a circle, pick a light source, and then use blending to create that smooth gradient from the brightest highlight to the darkest core shadow.
Next, give a cube a shot. A cube is a fantastic challenge because each flat plane will have a completely different value based on its angle to the light. The top plane might be the lightest, a side plane a mid-tone, and the far side the darkest. Try using hatching or cross-hatching to keep the edges crisp and defined.
By practicing on these fundamental shapes over and over, you're building a visual library in your mind. This knowledge is what will eventually allow you to shade any complex object you can dream up with confidence and skill.
Building Believable Worlds with Perspective
Perspective is what breathes life into a flat drawing, giving it a sense of depth and making it feel like a real, three-dimensional space. It might sound like a technical art-school term, but at its core, perspective is just a system for creating a convincing illusion. Once you get the hang of a few basic principles, you can start building worlds that your viewers feel like they could step right into.
The whole concept hinges on two key elements. First is the horizon line, which is simply a line representing the viewer’s eye level—think of it as where the earth meets the sky. Somewhere on this line, you'll place your vanishing point. This is the single spot on the horizon where parallel lines appear to meet and disappear. It’s the effect you see when you look down a long, straight road as it stretches into the distance.
Getting Started with One-Point Perspective
The most straightforward approach is one-point perspective, which, as the name suggests, uses just one vanishing point. This is your go-to technique for scenes where you're looking directly at the front of something, like a building, or straight down a railroad track or hallway.
Imagine you're drawing that long, empty highway. You’d start by drawing your horizon line across the page. Then, you place a single dot on that line—that’s your vanishing point. The parallel lines that form the edges of the road will start wide at the bottom of your page and converge until they meet at that single point.
To really sell the effect, you can add details. Draw a line of telephone poles or a fence along the road, making sure each one gets progressively smaller as it gets closer to the vanishing point. This simple setup immediately creates a powerful feeling of distance.
Adding Another Dimension with Two-Point Perspective
But what if you aren't looking at something head-on? What if you want to draw the corner of a building? For that, you’ll need two-point perspective. Instead of viewing the front of the object, you're looking at its corner, so the sides of the building need to recede to two separate vanishing points.
It sounds a bit more complicated, but the logic is identical. You still have your horizon line, but this time you'll place two vanishing points on it, usually far apart toward the edges of your paper. All the horizontal lines of your object (like the top and bottom of windows and rooflines) will recede toward one of those two points. The only lines that stay straight are your verticals.
This is the secret to drawing convincing buildings, boxes, cars, and even furniture when viewed from an angle.
To make it even clearer, let's break down when you'd use each approach. The table below gives you a quick reference for choosing the right type of perspective for your scene.
Key Differences in Basic Perspective
Feature | One-Point Perspective | Two-Point Perspective |
|---|---|---|
Best For | Scenes viewed head-on (hallways, roads, tunnels). | Objects viewed from a corner (buildings, boxes, rooms). |
Vanishing Points | One point on the horizon line. | Two points on the horizon line. |
Line Direction | Lines recede to a single point. Vertical and horizontal lines stay straight. | Sides recede to two different points. Only vertical lines stay straight. |
Common Use | Creating a sense of deep, direct distance. | Showing the form and volume of an object from an angle. |
This comparison should help you quickly decide which tool to pull out of your artistic toolbox depending on what you're trying to draw.
The following infographic touches on two other foundational drawing approaches, gesture and contour, which focus more on the subject itself rather than the space it occupies.
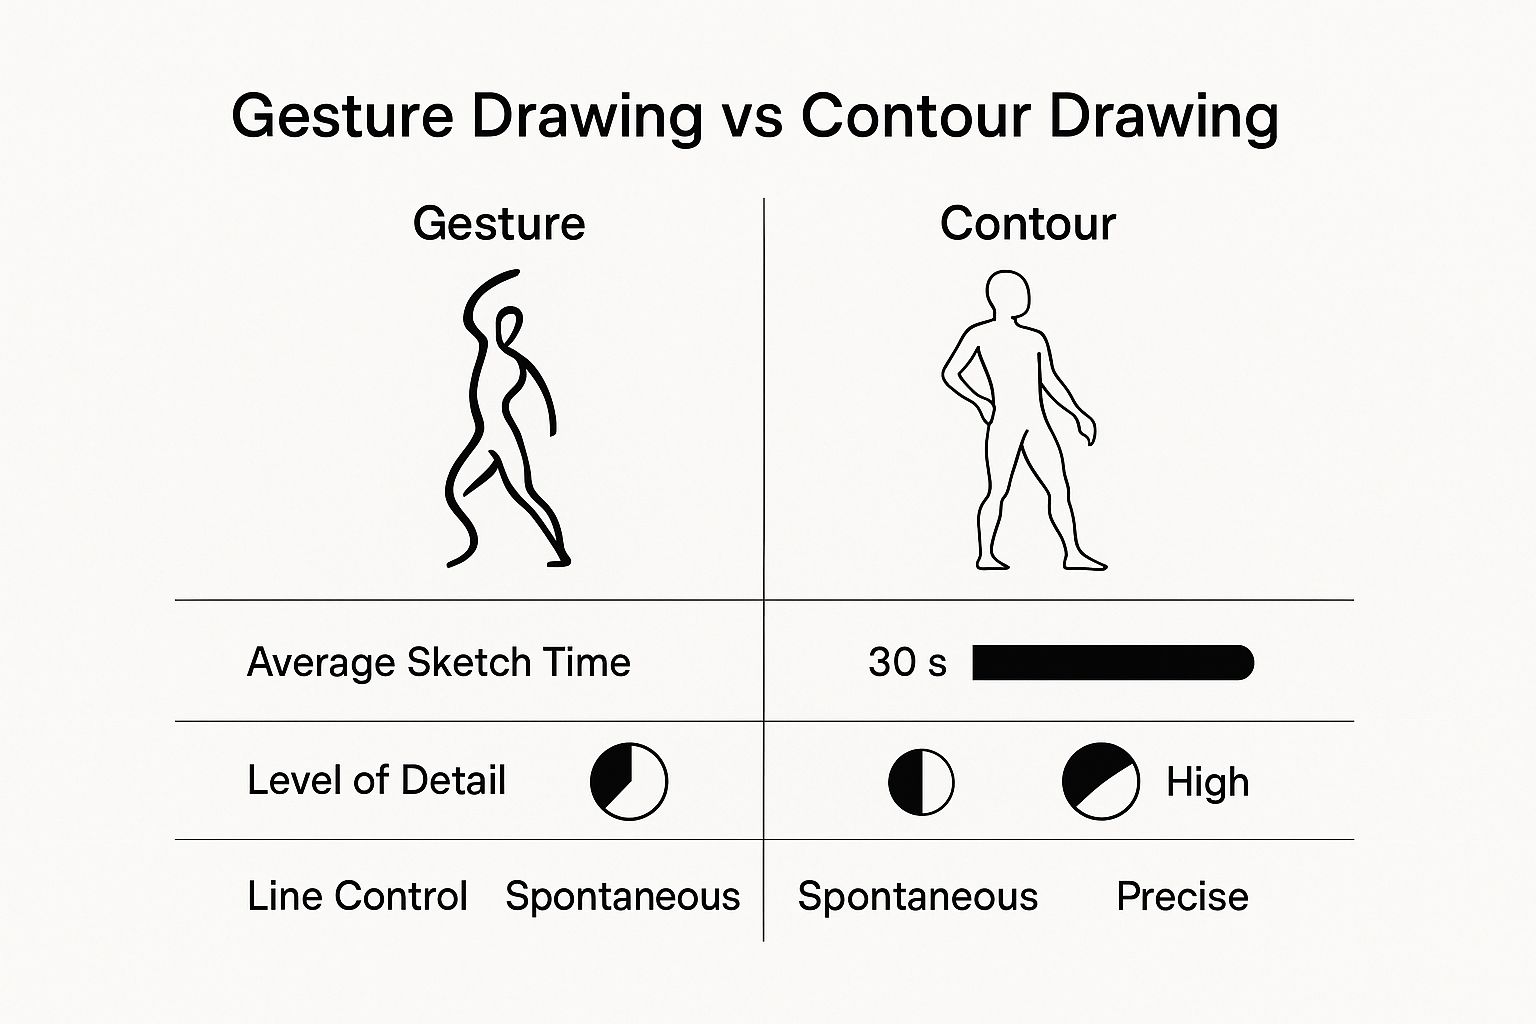
As the data illustrates, there's a clear trade-off. Gesture drawing is all about capturing energy and movement in seconds, while contour drawing is a slower, more meditative practice focused on precise outlines.
A Simple Trick for Realistic Proportions
One of the toughest parts of perspective is getting the scale right. It’s easy to accidentally draw a distant tree too large or a nearby car too small, which immediately shatters the illusion of depth.
A professional artist's secret weapon isn't some expensive tool—it's their thumb. Pencil measuring is a time-honored technique for judging proportions and distances without a ruler or any complicated math.
Here’s how you do it:
- Hold your pencil straight out at arm’s length, pointing it toward what you want to draw.
- Close one eye to flatten your view. Line up the tip of the pencil with the top of an object (say, a doorway) and slide your thumb down to mark the bottom.
- Now you have a unit of measurement. You can use that "doorway unit" to see how tall or wide other objects are in relation. Is that person half a doorway tall? Is the car one and a half doorways wide?
This is a fantastic real-world check that trains your eye to see the relationships between objects. It's a practical skill that connects what you see in the world directly to what you're putting on the page, making your drawings far more balanced and believable.
Capturing Realism with Texture and Detail
Once your drawings start to have some real form and depth, it's time to make them feel tangible. This is where texture comes in. Texture is the secret sauce that makes a drawing of a rock actually feel like a rock. It’s the visual language that tells the viewer if a surface is rough, smooth, shiny, or soft.
Getting this right will add a layer of realism that really pulls people into your work.
You don't have to draw every single grain of sand on a beach or each individual blade of grass. That's not the point. It's about suggesting texture through smart, intentional mark-making. How you handle your pencil—the pressure, the stroke, the direction—can mimic an incredible variety of surfaces.
From Strokes to Surfaces
Start thinking of your pencil as more than just a line-maker; it's a texture-creating tool. A few short, choppy, irregular strokes can instantly give the impression of an old, splintery wooden plank. On the other hand, long, smooth, blended strokes are perfect for suggesting polished metal or slick glass.
The trick is to let your drawing motion mirror the texture you're after.
- Rough Surfaces: This is where techniques like stippling (making tiny dots) and scumbling (using messy, circular scribbles) shine. A softer pencil, like a 4B, helps you get a nice range of dark, gritty marks.
- Smooth Surfaces: For these, you'll want to rely on careful blending. A tortillon (a rolled paper stump) or even your finger can work wonders. Use a harder pencil, maybe an HB, to keep your lines clean and consistent.
- Soft Surfaces: Think of things like fur or fabric. Use soft, flowing lines that wrap around the object's form. Gently layering your strokes is key to building up that plush, touchable feel.
A huge mistake I see beginners make is treating texture like wallpaper—just a flat pattern slapped on top of an object. Real texture follows the form. The cracks in a brick wall will curve around the corners, and the grain of wood will follow the contours of the surface.
Practicing with Purpose
Honestly, the best way to get a handle on texture is to draw from life. Grab some objects with interesting surfaces and see if you can capture their feel on paper.
- The Weathered Brick: Find an old brick wall and sketch a small section. Forget about making every brick perfect. Focus on the coarse texture, the crumbly mortar between them, and how shadows settle into the cracks.
- The Shiny Glass Bottle: With something like glass, texture is all about the reflections. Notice the sharp, bright highlights and the distorted shapes you see on its surface. A kneaded eraser is your best friend here for lifting out those brilliant white spots.
It’s clear that people are getting more interested in these foundational skills. The demand for good drawing tools is booming, with North America alone making up over 46% of the global drawing pencil market revenue in 2023. It’s never been easier to get quality supplies online, which is fantastic for anyone wanting to learn. If you're curious, you can dig deeper into the growth of the drawing pencil market at Cognitive Market Research.
When you set aside time to practice texture specifically, you start to build a visual vocabulary. Soon, you'll be able to convincingly render almost any surface you can imagine. Your drawings will have a new depth, inviting people to not just look at your art, but to truly feel it.
Common Questions from Beginner Artists
As you start getting your hands dirty with the fundamentals, questions are bound to pop up. It happens to everyone. Let's tackle some of the most common ones I hear from new artists so you can spend less time second-guessing and more time drawing.
How Often Should I Practice Drawing?
This is a big one. The key isn't how long you practice, but how often. Honestly, drawing for 15-30 minutes every single day will do more for your skills than a marathon 3-hour session once a week. It’s all about consistency.
Think of it like building muscle. Short, regular workouts are what create real strength and memory. This daily habit keeps your creative mind warmed up and builds that crucial hand-eye coordination much faster. You could focus on one tiny thing each day—maybe just straight lines on Monday, then shading a simple sphere on Tuesday. You’ll be surprised at how quickly those small, focused efforts add up.
My Drawings Look Flat. How Do I Fix This?
Ah, the dreaded flat drawing. It’s a classic beginner problem, and the fix almost always comes down to two things: value and contrast. If your art is leaning too heavily on outlines and all your grays look the same, it’s going to lack depth.
To give your drawings that pop of 3D form, you first have to decide where your light is coming from. Just that one decision tells you where the brightest highlights and the darkest core shadows should be.
The secret to making something feel solid is to be brave with your darks. Don't be afraid to grab a soft pencil, like a 4B, and really push those shadows. The bigger the gap between your lightest lights and your darkest darks, the more real and three-dimensional your object will feel.
Try this: put an apple or a coffee mug on your desk and shine a lamp on it. Now, just focus on shading it, paying close attention to how the light hits it and creates different tones. Mastering this is a game-changer.
Is It Better to Draw from Photos or Real Life?
Both have their place, but if you're just starting out, drawing from real life is incredibly powerful. When you sketch something that’s actually in front of you, you're training your brain to translate a 3D world onto a 2D page. There's no better way to get a gut feeling for perspective, proportion, and how light really works.
Photos are fantastic tools, of course. They're perfect for subjects that won't sit still, like your dog or a fleeting expression. The catch is that a camera lens can flatten an image and distort perspective in ways you might not even notice.
A smart approach is to use both:
- Draw from life to build your core observational skills. Set up a simple still life and go for it.
- Use photos as a reference when you need to capture a specific detail or a subject you can't see in person.
This balanced method gives you the best of both worlds. If you're ever stuck on what to draw, you can find a ton of beginner drawing ideas to get the ball rolling.
At Drawing List, we believe that the right prompt can be the perfect cure for artist's block. Our AI-powered generator is packed with endless ideas to help you practice these techniques and build real confidence. Find your next drawing idea today!