As the air crisps and leaves burst into a symphony of reds, oranges, and yellows, the desire to create often follows. This season offers a unique palette and an abundance of natural materials, making it the perfect time to dive into new fall art projects. Whether you are a seasoned artist seeking fresh inspiration or a beginner looking for an accessible way to celebrate autumn's beauty, this comprehensive guide provides a curated selection of engaging ideas. We move beyond generic crafts to explore projects that blend traditional techniques with contemporary flair, ensuring there is a creative outlet for every skill level.
This listicle is designed to be a practical resource. Inside, you will find detailed instructions and material lists for a variety of projects, from the delicate art of botanical preservation with pressed leaves to the whimsical creativity of pumpkin painting and pine cone sculptures. We will also explore watercolor landscapes, traditional corn husk doll making, and even charming crafts using acorn caps and apple prints. Each section offers actionable insights and creative variations to help you transform the fleeting beauty of fall into lasting works of art. Let's explore how you can capture the essence of autumn on your canvas, in your home, and through your own two hands.
1. Pressed Leaf Art & Botanical Preservation
Pressed leaf art is a timeless craft that captures the ephemeral beauty of autumn. This botanical preservation technique involves collecting colorful fall leaves, pressing them flat to remove moisture and preserve their shape, and then arranging them into stunning artistic compositions. It's a fantastic way to engage with nature and create a lasting tribute to the season’s vibrant palette, making it a quintessential fall art project.
The process transforms delicate, fleeting foliage into permanent art. Artists can create intricate collages, frame arrangements between glass panels, or decorate items like bookmarks, greeting cards, and journals. This method celebrates the unique patterns, textures, and fiery hues of each individual leaf.

Why This Project Shines
This technique is beloved by artists for its accessibility and direct connection to the natural world. From Victorian-era botanists documenting flora to contemporary artists like Helen Ahpornsiri who creates incredibly detailed illustrations from tiny fern and flower pieces, leaf pressing has a rich history. It’s an ideal project for all ages, combining a nature walk with a creative studio session. The final pieces are delicate, sophisticated, and bring an organic, rustic elegance to any space.
Getting Started: Actionable Tips
To ensure your pressed leaf art is vibrant and long-lasting, follow these key steps:
- Collect Strategically: Gather leaves on a dry, sunny afternoon. Damp leaves are prone to developing mold during the pressing process. Look for leaves that are vibrant and relatively flat.
- Pressing Method: Place leaves between two sheets of parchment paper inside a heavy book. Add more books on top for weight and leave them for one to two weeks. Check periodically to ensure they are drying flat.
- Preserve the Color: Once pressed, you can spray the leaves with a clear acrylic sealant (matte or gloss finish) to protect their color from fading over time.
- Handle with Care: Pressed leaves are brittle. Work quickly and carefully once you remove them from the press to prevent them from curling up or cracking. Use tweezers for precise placement.
- Storage: Keep any unused pressed leaves stored flat between sheets of acid-free paper in a dry, dark place to maintain their integrity for future projects.
2. Pumpkin and Gourd Painting & Decorating
Pumpkin and gourd painting is a versatile and creative fall art project that offers a modern, often longer-lasting alternative to traditional carving. This technique transforms humble harvest produce into stunning decorative pieces using paint, stencils, and various embellishments. It’s an accessible craft that allows for endless artistic expression, from elegant, minimalist designs to playful, whimsical characters.
Artists can explore a wide range of styles, creating everything from chic metallic-dipped pumpkins to intricate hand-painted patterns. The smooth, curved surfaces of pumpkins and gourds serve as unique three-dimensional canvases. This popular activity bypasses the mess and sharp tools of carving, making it a safe and engaging project for all ages and skill levels.

Why This Project Shines
This project has been popularized by decorating mavens like Martha Stewart, whose elegant designs set a high bar for seasonal decor, and further amplified by the vibrant DIY communities on Pinterest and Instagram. Unlike carved pumpkins that rot quickly, painted gourds can last for weeks or even months, especially if sealed properly. This extended lifespan allows your artwork to be enjoyed throughout the entire autumn season.
The creative freedom is immense. You can create farmhouse-style neutral displays, celestial galaxy pumpkins, or even character-themed pumpkins for a touch of pop culture fun. This project truly shines as a centerpiece for fall gatherings or as stylish porch decor. For more inspiration, you can find a wealth of pumpkin and harvest festival drawing ideas that translate beautifully to painted designs.
Getting Started: Actionable Tips
To create a beautiful and durable painted pumpkin, consider these practical tips:
- Prep the Surface: Before painting, wipe your pumpkin or gourd with a damp cloth or a diluted bleach solution to remove dirt and bacteria. A clean, dry surface ensures the paint adheres properly.
- Prime First: For the most vibrant colors and better durability, apply a coat of acrylic gesso or a spray-on primer. This is especially important for achieving opaque coverage on dark orange pumpkins.
- Choose the Right Paint: Acrylic craft paint works wonderfully. For a trendy, matte look, chalk paint provides excellent adhesion without needing a primer.
- Use the Right Tools: Foam brushes are perfect for applying smooth, even base coats on the pumpkin’s curved surface. Use smaller, detailed brushes for intricate patterns and designs.
- Seal Your Work: To protect your creation from moisture and chipping, especially for outdoor displays, finish with a coat of clear acrylic sealant or polyurethane spray. Choose a matte, satin, or gloss finish to match your desired aesthetic.
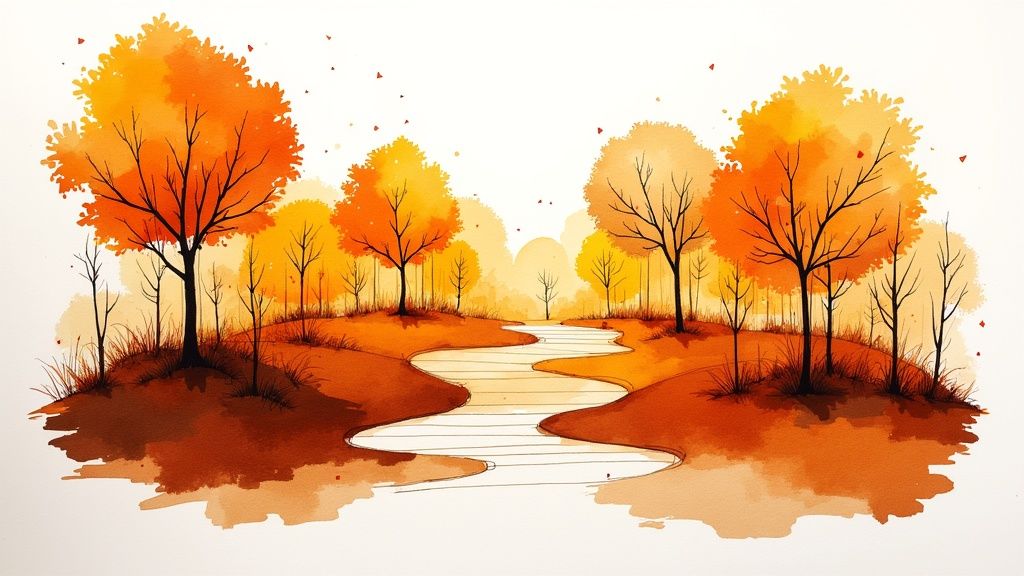
3. Fall Watercolor Landscapes
Painting fall watercolor landscapes is a classic art form that masterfully captures the dramatic color changes and atmospheric qualities of autumn. This technique leverages watercolor’s unique, fluid properties to create the soft, flowing effects that perfectly represent fall mists, golden light, and the organic transitions between warm autumn colors. It's a deeply expressive and rewarding fall art project for artists of all levels.
The medium’s transparency allows artists to build up layers of color, mimicking the depth and richness of a forest canopy or a sunset-drenched field. By skillfully manipulating water and pigment, painters can achieve effects ranging from sharp, crisp details on a fallen leaf to soft, hazy backgrounds, embodying the very essence of the season.
Why This Project Shines
This project is celebrated for its ability to convey mood and light. The tradition was popularized by English masters like J.M.W. Turner and continued by American artists like Winslow Homer, whose New England scenes are iconic. Contemporary masters such as Alvaro Castagnet showcase the dynamic, atmospheric potential of the medium. Painting a landscape, whether from a photo or a plein air session, forces the artist to observe and interpret the subtle nuances of fall’s beauty, making it a meditative and immersive creative experience. For more inspiration, you can find ideas for depicting an autumn forest pathway.
Getting Started: Actionable Tips
To create luminous and compelling fall watercolor landscapes, focus on these key techniques:
- Warm Palette Dominance: Let warm colors like cadmium orange, burnt sienna, and quinacridone gold lead your palette. Use cooler tones like ultramarine blue or Payne’s gray sparingly to create contrast and shadow.
- Master Wet-on-Wet: To create soft skies or foggy backgrounds, apply wet paint onto a wet paper surface. This allows the colors to bleed and blend naturally, creating beautiful, soft-edged effects.
- Preserve Your Lights: Leave areas of the white paper untouched to represent the brightest highlights, like the glint of sun on water or the bright bark of a birch tree. This is a fundamental watercolor principle.
- Work from Light to Dark: Build your painting in transparent layers, starting with the lightest colors and gradually adding darker tones. This method gives your work depth and luminosity.
- Use Masking Fluid: For sharp, light-colored details against a dark background, apply masking fluid before you paint. Once the paint is dry, gently rub it off to reveal the preserved white paper underneath.
4. Corn Husk Doll Making
Corn husk doll making is a traditional craft with deep roots in Native American and colonial American history. This sustainable art form transforms dried corn husks, a byproduct of the harvest, into charming and expressive folk art figures. The process involves soaking, shaping, and tying the husks to form dolls, which can be left plain or decorated with natural materials. It stands out as a unique fall art project that connects us to agricultural traditions and resourceful creativity.
This technique uses the pliable, fibrous nature of moistened corn husks to create everything from simple figures to intricate, detailed characters. Artists can craft dolls representing historical figures, dress them in period-appropriate clothing made from fabric scraps, or adorn them with elements like acorn caps for hats and corn silk for hair. The finished dolls are rustic, tactile, and carry a story of heritage and harvest.
Why This Project Shines
This craft is treasured for its powerful connection to history, sustainability, and storytelling. Traditionally, Haudenosaunee (Iroquois) dolls were made without faces to teach a lesson about vanity. Today, the tradition is preserved by contemporary Native American artists and demonstrated at cultural centers and living history museums like Colonial Williamsburg. It’s an excellent project for exploring cultural history and understanding how art can be created from the land itself. The simplicity of the materials makes it accessible, yet it offers endless possibilities for customization.
Getting Started: Actionable Tips
To create beautiful and sturdy corn husk dolls, follow these fundamental steps:
- Proper Soaking: Before you begin, soak the dried corn husks in warm water for about 30 minutes, or until they are soft and pliable. This prevents them from cracking as you fold and shape them.
- Tying Securely: Use a strong, thin material for tying the doll together. Waxed linen thread, embroidery floss, or even thin strips of a durable corn husk work perfectly for binding the head, waist, and limbs.
- Work While Damp: The husks are easiest to manipulate when they are damp but not dripping wet. Gently squeeze out excess water or pat them with a towel before you start assembling your figure.
- Plan Proportions: Before tying, lay out the husks to get a sense of the doll's proportions. A common method is to fold a bundle of husks in half over a twisted core to form the head and body.
- Ensure Proper Drying: Once your doll is complete, allow it to air dry thoroughly for a few days in a well-ventilated area. Store finished dolls in a dry environment to prevent mold and preserve their form.
5. Acorn Cap Crafts and Miniature Art
This delicate craft transforms the humble acorn cap into a tiny vessel for boundless creativity. Artists use the perfect natural bowl shape and interesting texture of these caps as bases for detailed miniature scenes, tiny candles, or charming characters. It’s a wonderful fall art project that encourages a closer look at nature's smaller, often-overlooked treasures.
The process involves turning these found objects into miniature works of art. Crafters can create tiny fairy house accessories, fill them with scented wax for decorative candles, or assemble them into whimsical woodland creatures. This art form celebrates the beauty of small-scale detail and the rustic charm of natural materials found right on the forest floor.
Why This Project Shines
This project is beloved by miniaturists and nature craft enthusiasts for its ability to create magical, tiny worlds from simple, natural elements. It taps into the enchanting world of fairy gardens and dollhouse miniatures, but with a distinctly autumnal and organic twist. The practice has been popularized by nature craft bloggers and environmental education programs that teach children to appreciate nature's artistry. The act of hunting for the perfect acorn caps, much like a squirrel gathering acorns, connects the artist directly to the rhythm of the season.
Getting Started: Actionable Tips
To create enchanting and durable acorn cap art, focus on careful preparation and detailed execution:
- Clean and Prepare: Before crafting, clean your acorn caps by gently wiping them with a damp cloth. Bake them on a baking sheet at a low temperature (around 200°F or 93°C) for about an hour to eliminate any insects or larvae.
- Strengthen Fragile Caps: Some caps can be brittle. Apply a thin layer of Mod Podge or a clear sealant inside and out to strengthen them and add a subtle sheen.
- Create Miniature Candles: For tiny candles, melt beeswax and place a small wick in the center of the cap. Carefully pour the melted wax into the cap and let it cool completely.
- Detail-Oriented Tools: Working on such a small scale requires precision. Use fine-tipped paintbrushes, toothpicks for applying glue or paint dots, and tweezers for placing tiny elements.
- Protect Your Creations: Finished pieces are delicate. Store them in small, protective containers or display them in a case or shadow box to prevent damage and dust accumulation.
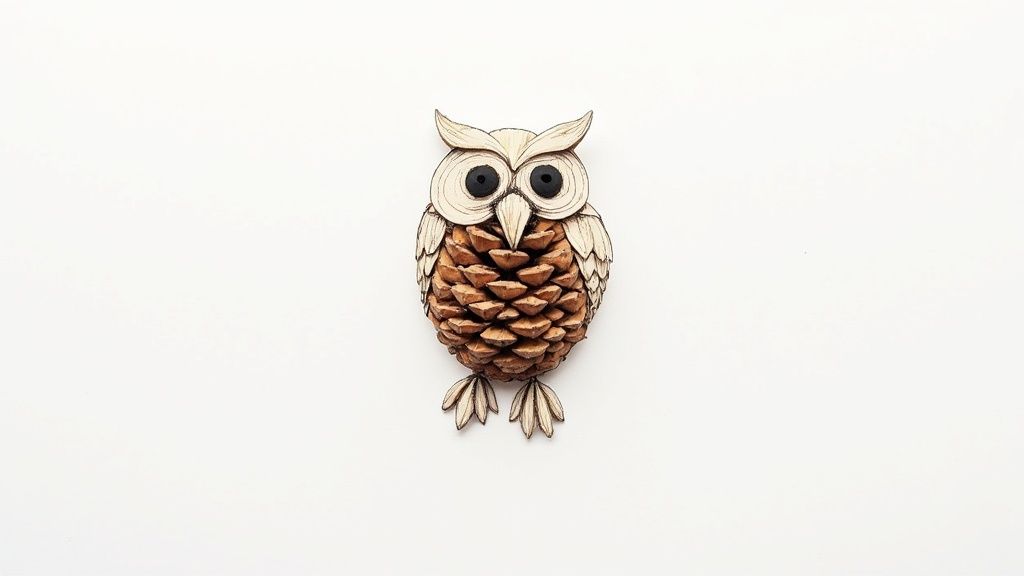
6. Pine Cone Animal Sculptures
Pine cone animal sculptures are a delightful three-dimensional craft that transforms humble, foraged materials into whimsical creatures. This project involves using the natural texture and shape of pine cones as a base, then adding materials like felt, clay, googly eyes, and paper to create charming animal figures. It’s a wonderful fall art project that bridges the gap between a nature walk and a creative studio session.
The unique, layered scales of a pine cone can mimic feathers, fur, or quills, providing a perfect starting point for animals like owls, hedgehogs, foxes, and festive turkeys. This craft allows artists of all ages to see the artistic potential in natural objects and develop their sculptural skills by adding personality and form to a found item.
Why This Project Shines
This craft is a staple in elementary art classrooms and nature center workshops for its simplicity, affordability, and tactile engagement. Its popularity in family craft books and on social media communities like Pinterest speaks to its universal appeal. The project encourages resourcefulness and an appreciation for nature's ready-made art supplies. Creating these sculptures is an excellent activity for developing fine motor skills and three-dimensional thinking, making it both educational and entertaining.
Getting Started: Actionable Tips
Follow these key steps to create sturdy and adorable pine cone animals:
- Prepare Your Pine Cones: Before crafting, bake your collected pine cones on a baking sheet at 200°F (93°C) for about 30 minutes. This process kills any lingering insects, removes sap, and helps the scales fully open up.
- Choose the Right Shape: Select pine cones whose natural shape suggests the animal you want to create. A round, squat pine cone is perfect for an owl or hedgehog, while a longer, narrower one might be better for a fox or mouse.
- Use Strong Adhesives: A hot glue gun is the most effective tool for securely attaching heavier elements like felt wings, clay noses, or twig antlers. For younger children, a strong craft glue can be used with adult supervision and longer drying times.
- Bring Them to Life: Add googly eyes as one of the final steps. This simple addition instantly gives your sculpture personality and character, transforming it from a collection of parts into a lively creature.
- Seal for Longevity: Once your creation is complete and the glue is dry, you can spray the finished sculpture with a clear acrylic sealant. This will help preserve the pine cone and protect your additions from falling off over time.
7. Apple Printing and Stamping
Apple printing is a classic and delightful printmaking technique that uses the humble apple as a natural stamp. This method involves slicing an apple in half, applying paint to the cut surface, and pressing it onto paper, fabric, or other materials to create charming prints. It’s a wonderful fall art project that celebrates the harvest season in a hands-on, accessible way for artists of all ages.
The magic of this project lies in its simplicity and the beautiful, organic shapes it produces. A horizontal cut reveals a natural star-shaped pattern at the core, while a vertical cut creates the iconic apple silhouette. The process turns a simple piece of fruit into a versatile tool for creating patterns, rustic illustrations, and festive decorations that evoke the cozy spirit of autumn.
Why This Project Shines
This technique is beloved in early childhood education and art therapy for its sensory appeal and satisfying results. The process requires minimal setup and uses readily available materials, making it a perfect impromptu activity. It's often used to create festive classroom bulletin boards, custom-printed textiles for tote bags or tea towels, and unique, handmade greeting cards. Its simplicity allows for a focus on color, composition, and pattern without the need for complex technical skills, providing an immediate and gratifying creative experience.
Getting Started: Actionable Tips
To get crisp and vibrant apple prints, follow these key steps:
- Prep the Stamp: After cutting your apple, pat the cut surface gently with a paper towel. This removes excess moisture and helps the paint adhere better for a cleaner print.
- Choose the Right Paint: Use a thick, opaque paint like tempera or acrylic. Apply a thin, even layer with a paintbrush to the apple’s surface for the best coverage.
- Work Efficiently: An apple’s surface begins to oxidize and brown once cut. Work relatively quickly after applying paint to capture the best print before the texture changes.
- Practice Your Pressure: Before starting on your final piece, do a few test prints on scrap paper. This helps you figure out the right amount of paint and pressure needed to get a clear, defined shape without smudging.
- Vary Your Apples: Don’t be afraid to use different types of apples. A mix of varieties like Granny Smith, Gala, or Red Delicious will provide different sizes and slightly different core patterns, adding more visual interest to your work.
7 Fall Art Projects Comparison Table
Item | Implementation Complexity | Resource Requirements | Expected Outcomes | Ideal Use Cases | Key Advantages |
|---|---|---|---|---|---|
Pressed Leaf Art & Botanical Preservation | Moderate; requires patience over weeks | Natural leaves, pressing materials, frames | Delicate, lasting botanical artwork | Nature art, educational projects | Eco-friendly, therapeutic, unique natural art |
Pumpkin and Gourd Painting & Decorating | Low to moderate; simple painting skills | Pumpkins/gourds, paints, brushes, sealants | Decorative, colorful, weather-resistant art | Seasonal decor, all ages craft | Safe alternative to carving, versatile designs |
Fall Watercolor Landscapes | Moderate to high; requires painting skill | Watercolors, brushes, high-quality paper | Luminous, atmospheric autumn landscapes | Fine art, plein air painting | Portable, quick-drying, natural color blending |
Corn Husk Doll Making | Moderate; detailed handcrafting | Dried corn husks, water, thread | Unique, traditional folk art dolls | Cultural crafts, historical education | Natural, biodegradable, rich cultural meaning |
Acorn Cap Crafts and Miniature Art | High; requires fine motor skills | Acorn caps, natural embellishments, glue | Miniature vessels and whimsical scenes | Miniature art, fairy garden accessories | Sustainable, intricate, appealing to all ages |
Pine Cone Animal Sculptures | Low to moderate; simple assembly | Pine cones, clay, felt, glue | Sturdy 3D animal sculptures | Family crafts, educational displays | Durable, uses natural textures, engaging for kids |
Apple Printing and Stamping | Low; very simple technique | Apples, paints or inks, paper/fabric | Organic, repeated patterns and textures | Early childhood art, printmaking basics | Inexpensive, safe for young children, multiple prints |
From Inspiration to Creation: Your Next Artistic Step
The transition from summer's vibrant greens to autumn's rich tapestry of reds, oranges, and golds offers more than just a change in scenery; it provides a profound source of artistic inspiration. We've journeyed through a collection of diverse fall art projects, each designed to capture the unique essence of this transformative season. From the delicate, intricate process of botanical preservation with pressed leaves to the whimsical, three-dimensional fun of creating pine cone animal sculptures, the possibilities are as varied as the leaves on the trees.
These projects are more than just step-by-step instructions. They are invitations to engage your senses, to notice the subtle textures of an acorn cap, the brilliant hues of a changing leaf, or the satisfying heft of a pumpkin. By embracing these activities, you are not just creating decor; you are building a deeper connection to the natural world and honing your artistic skills in a meaningful, seasonal context. The true value lies in the process itself, the act of translating the beauty you see around you into a tangible piece of art.
Key Takeaways for Your Autumn Art Journey
To make the most of this creative season, keep these core principles in mind as you embark on your next project:
- Embrace Natural Materials: The most authentic fall art projects begin with materials gathered from nature. A walk in the woods or a visit to a local farm can be the first step in your creative process, providing you with a palette of leaves, pine cones, acorns, and gourds that are free and full of character.
- Adapt and Innovate: View the ideas presented here, such as apple stamping or corn husk doll making, as foundational starting points. Don't be afraid to experiment. What else can you print with? What other figures can you create? The most rewarding creations often come from unexpected variations and personal touches.
- Focus on the Process, Not Perfection: Whether you are blending colors in a watercolor landscape or carefully painting a detailed design on a gourd, allow yourself to enjoy the act of creating. Each project is an opportunity for learning and relaxation, a moment to step away from digital screens and engage in a hands-on, meditative activity.
The skills you practice with these seasonal activities, from composition in botanical art to color theory in landscape painting, are transferable to your artistic practice year-round. Mastering these simple yet effective techniques builds a foundation of confidence and competence, encouraging you to tackle more complex projects in the future. Let this fall be the season you don't just admire the beauty but actively participate in it. Choose a project that excites you, gather your supplies, and transform this fleeting season's inspiration into lasting art.
Feeling inspired but not sure what to draw next? The Drawing List platform offers a powerful Drawing Ideas Generator perfect for finding your next subject, whether it's a specific fall scene or a unique character to incorporate into your art. Visit Drawing List to discover endless prompts that will keep your creativity flowing all autumn long.