Every artist, from seasoned professionals to weekend doodlers, eventually faces the blank page and asks, "What should I draw?" This creative block isn't a sign of lacking skill but often a need for a spark of fresh inspiration. This comprehensive guide provides a curated collection of foundational and actionable ideas on what to draw, moving beyond generic prompts to offer structured categories that help build specific artistic skills while fueling your creativity.
This listicle is designed to be a definitive resource, offering nine distinct themes to explore. Whether your goal is to master the subtleties of human anatomy through portraiture, capture the vibrant energy of your city with urban sketching, or invent entirely new worlds by designing mythical beasts, these focused areas provide a solid starting point for any project. Each category serves as a gateway to a new world of artistic exploration, packed with practical tips and tangible examples to help you start creating immediately.
We will break down each concept into digestible, actionable steps, ensuring you have a clear path forward. Consider this your roadmap for overcoming creative hurdles and rediscovering the joy of drawing. Let’s turn that empty page into a portfolio piece.
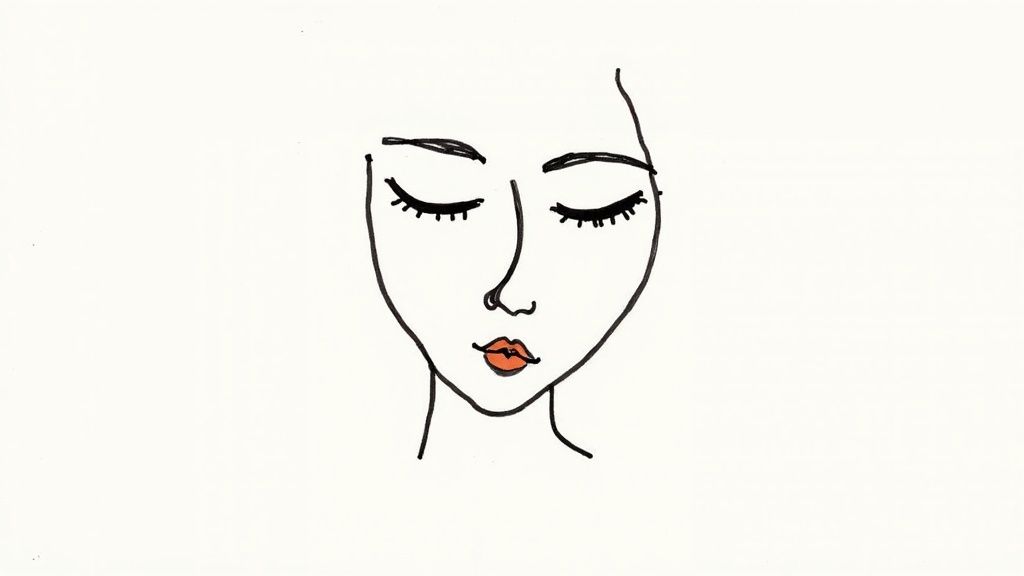
1. Portrait Drawing
Portrait drawing is the timeless art of capturing a person's likeness, character, and mood. More than just creating a realistic copy of a face, it's about interpreting personality through line, shadow, and form. This fundamental practice is a fantastic idea for what to draw because it sharpens observation skills, deepens your understanding of anatomy, and connects you with the deeply human element of art. From the detailed self-portraits of Leonardo da Vinci to the expressive charcoal works of John Singer Sargent, portraiture is a cornerstone of artistic development.
How to Get Started with Portrait Drawing
Tackling a portrait can feel intimidating, but breaking it down into manageable steps makes it accessible for any skill level. The key is to build a solid foundation before diving into intricate details like eyelashes or hair strands.
- Master Proportions First: Start by learning the basic guidelines of facial proportion, such as the Loomis method. This provides a structural map, ensuring eyes, nose, and mouth are placed correctly.
- Alternate Your Subjects: Practice drawing from both high-quality photographs and live models. Photos allow you to study details without a time limit, while live sessions teach you to capture the essence and energy of a person quickly.
- Focus on Individual Features: Dedicate practice sessions to drawing just eyes, noses, or mouths. This focused repetition builds muscle memory and confidence, making the complete portrait less daunting.
- Use a Grid for Accuracy: For beginners struggling with likeness, the grid method is an excellent tool. It breaks the image into smaller, more manageable squares, helping you focus on shapes and lines rather than the whole face.
Pro-Tip: Don't get lost in the details too early. Begin with a light "gesture" sketch to capture the overall shape of the head, the tilt, and the basic placement of features before committing to darker, more permanent lines.
2. Nature and Landscape Drawing
Nature and landscape drawing is the practice of capturing the beauty of the natural world, from sweeping mountain vistas to the delicate details of a single leaf. This genre is one of the most rewarding ideas on what to draw because it teaches artists about composition, atmospheric perspective, and rendering organic textures like bark, water, and clouds. It encourages you to step outside and observe the world more closely, transforming a simple walk in the park into an artistic opportunity. From the dramatic cloud studies of John Constable to the detailed botanical illustrations found in scientific journals, depicting nature is a timeless pursuit.

How to Get Started with Nature and Landscape Drawing
Drawing the vastness of nature can feel overwhelming, but focusing on fundamental elements and building from there makes it an accessible and enjoyable practice for artists at any level. The goal is to interpret the scene, not replicate every single leaf or blade of grass.
- Start with Simple Compositions: Begin by drawing individual natural objects like a single tree, a rock, or a flower. This helps you understand their form and texture before tackling a complex scene with a foreground, midground, and background.
- Carry a Compact Sketching Kit: Keep a small sketchbook, a few pencils, and an eraser with you. This allows you to practice plein air (outdoor) drawing whenever inspiration strikes, helping you learn to capture light and shadow quickly.
- Practice Basic Natural Shapes: Dedicate time to sketching common landscape elements. Learn to draw different types of clouds (cumulus, cirrus) and tree silhouettes (oak, pine). This creates a visual library you can pull from for future compositions.
- Study How Light Changes: Observe and sketch the same scene at different times of the day, such as sunrise, midday, and sunset. This is a powerful exercise for understanding how light direction dramatically alters shadows, colors, and mood.
Pro-Tip: When drawing a landscape, squint your eyes to blur the details. This simplifies the scene into large, basic shapes and value masses, helping you establish a strong, balanced composition before getting caught up in the specifics.
3. Still Life Drawing
Still life drawing is the classic art of depicting inanimate objects, allowing you to master composition, light, and texture in a controlled setting. Rather than just sketching items on a table, it’s about arranging them to create a compelling narrative or visual harmony. This practice is an essential idea for what to draw because it provides total control over the subject matter, making it a perfect laboratory for developing fundamental skills like rendering form, understanding how light behaves on different surfaces, and composing a balanced image. From the subtle, contemplative bottle studies of Giorgio Morandi to the rich arrangements of Jean-Baptiste-Siméon Chardin, still life is a foundational exercise for artists of all levels.

How to Get Started with Still Life Drawing
Setting up a still life is an art form in itself, but starting simply is the key to building confidence and skill. The goal is to focus on the relationships between objects, light, and shadow without feeling overwhelmed by complexity.
- Start with Simple Forms: Begin by arranging basic geometric objects like cubes, spheres, and cones. This helps you focus purely on how light creates form without the distraction of complex textures or details.
- Use a Single Light Source: Illuminate your arrangement with one strong light source, such as a desk lamp. This creates clear, defined shadows and highlights, making it easier to understand and render three-dimensional form.
- Vary Your Textures: As you get more comfortable, create setups that include objects with different surface qualities: something shiny (glass), something matte (ceramic), and something soft (fabric). This challenges you to observe and replicate how light interacts differently with each one.
- Focus on Negative Space: Pay attention to the empty spaces between and around the objects. Drawing these "negative shapes" accurately is a powerful trick that helps ensure your objects are positioned correctly in relation to each other.
Pro-Tip: Before you start drawing the objects, do a few quick "thumbnail" sketches of different compositions. This helps you find the most interesting arrangement and viewpoint before committing to a full drawing.
4. Fantasy and Mythical Creatures
Drawing fantasy creatures is a thrilling exercise in blending reality with imagination, allowing you to bring mythical beings to life. This genre challenges you to invent creatures like dragons, griffins, and phoenixes, or even create entirely new ones from scratch. It is an excellent idea for what to draw because it forces you to understand real-world anatomy to build believable, yet fantastical, forms. From the majestic dragons in Game of Thrones concept art to the enchanting spirits in Studio Ghibli films, creating mythical beasts is a cornerstone of fantasy illustration.

How to Get Started with Fantasy and Mythical Creatures
The key to creating a convincing creature is grounding its fantastical elements in a foundation of realism. This makes the unbelievable feel tangible and gives your creation a sense of weight and presence. For more inspiration, explore our guide on fantasy creature drawing ideas.
- Study Real Animal Anatomy: Before drawing a dragon, study the anatomy of bats, lizards, and large cats. Understanding how real skeletons, muscles, and wings function will make your fantasy creations far more believable.
- Research Mythological Sources: Dive into folklore and mythology from various cultures. These stories provide rich descriptions and established rules for creatures like the kitsune or the chimera, giving you a strong starting point for your own interpretation.
- Start with Simple Modifications: Begin by taking a real animal, like a horse, and adding a single fantasy element, such as wings or a horn. This helps you practice integrating fantastical features onto a familiar anatomical structure.
- Create Consistent Design Rules: Establish a set of rules for your creature’s world. For example, if your dragons are reptilian, their wings should have a leathery texture, not feathered ones. Consistency makes your designs feel more cohesive and professional.
Pro-Tip: Don't just draw your creature standing still. Sketch it in multiple dynamic poses: flying, hunting, or resting. This helps you understand its anatomy from every angle and brings your creation to life.
5. Urban Sketching and Architecture
Urban sketching is the vibrant practice of drawing on location, capturing the life, architecture, and energy of cities and towns directly in your sketchbook. It’s less about creating a perfect architectural rendering and more about documenting a moment in time, a specific viewpoint, or the unique character of a place. This is a fantastic idea for what to draw because it gets you out of the studio and into the world, dramatically improving your skills in perspective, composition, and observational speed. From the lively city scenes of Gabriel Campanario to the detailed travel journals seen across social media, urban sketching transforms your environment into an endless source of inspiration.
How to Get Started with Urban Sketching
Venturing out to draw in public can seem daunting, but it’s a rewarding skill that builds confidence quickly. The key is to start simple and focus on observation rather than perfection, embracing the spontaneous nature of on-location drawing.
- Master Basic Perspective: Begin by learning one-point and two-point perspective. Understanding how to create the illusion of depth is fundamental to drawing believable buildings and street scenes.
- Start with a Single Subject: Don't try to draw the entire city block at first. Focus on a single interesting element like a unique doorway, a park bench, or a street lamp to build your confidence.
- Simplify Complex Scenes: Learn to edit what you see. Instead of drawing every single brick or window, focus on the major shapes, shadows, and overall form to capture the building’s character. For more guidance, discover how you can get started with easy urban sketching ideas on drawinglist.com.
- Work with a Limited Toolkit: Start with just a sketchbook and a pen or a few pencils. This keeps you mobile and forces you to focus on the essentials of line and shape without getting overwhelmed by materials.
Pro-Tip: Embrace the imperfections. A slightly skewed line or an incomplete detail adds character and tells the story of your direct observation. The goal of urban sketching isn't flawless accuracy but capturing the feeling of the place.
6. Character Design and Illustration
Character design is the imaginative process of creating a unique, compelling figure from scratch. It’s more than just drawing a person; it's about visually communicating a story, personality, and purpose through shape, color, and posture. This is one of the most rewarding ideas on what to draw because it blends storytelling with visual art, challenging you to think like a writer and an illustrator simultaneously. From the iconic designs of Hayao Miyazaki to the memorable casts of Pixar films, character illustration is about bringing a new being to life on the page.
How to Get Started with Character Design
Developing a believable character is an exercise in both creativity and technical skill. The goal is to build a figure that feels authentic and visually interesting. Breaking the process down helps transform a blank page into a vibrant personality.
- Define Personality Before Appearance: Before drawing, write down three to five core personality traits (e.g., brave, clumsy, scholarly). Let these traits guide your design choices, from their posture to their clothing.
- Start with Basic Shapes and Silhouettes: Great character designs are recognizable even from their silhouette. Experiment by building your character from simple shapes like circles, squares, and triangles to establish a strong visual foundation.
- Study Successful Character Designs: Analyze your favorite characters from games, comics, and animation. Ask yourself why they work. Notice how their design elements, such as color palettes and clothing, reinforce their roles in the story.
- Draw from Multiple Angles: To truly understand your character, practice drawing them from different perspectives and in various poses. This helps solidify their design in three-dimensional space and makes them feel more dynamic and real.
Pro-Tip: Consider the character's world and context. A sci-fi warrior will have vastly different clothing and gear than a medieval baker. Grounding your design in a specific environment adds a crucial layer of believability.
7. Animal Studies
Animal studies involve capturing the diverse forms, movements, and personalities of creatures from across the animal kingdom. Much more than just drawing a pet, this practice is a deep dive into anatomy, texture, and behavior. It's a brilliant idea for what to draw because it forces you to observe and interpret dynamic subjects, from the powerful musculature of a horse to the delicate texture of a bird's feathers. Greats like Rosa Bonheur and Robert Bateman have shown that animal art is a profound way to connect with the natural world and refine your technical skills.
How to Get Started with Animal Studies
Drawing animals can seem complex due to their varied anatomy and constant motion, but a structured approach makes it achievable. The goal is to first understand the form and then add the unique details that bring the creature to life.
- Start with Basic Shapes: Before drawing fur or scales, break the animal down into simple geometric shapes like circles, ovals, and cylinders. This helps you establish accurate proportions and the overall gesture of the pose.
- Study Skeletons and Muscles: A basic understanding of animal anatomy is crucial. Look at skeletal diagrams to see how the bones connect, which will help you draw more believable and dynamic poses.
- Practice Gesture Drawings: Visit a zoo, a dog park, or watch wildlife documentaries and do quick, timed sketches (30-60 seconds). This exercise trains your hand and eye to capture the essence of movement and form rather than getting bogged down in detail.
- Focus on Textures: Dedicate practice time to rendering different textures. Practice drawing short, dense fur, long flowing manes, rough scales, and soft feathers to build a visual library you can pull from.
Pro-Tip: Pay close attention to the eyes. The eyes are often the focal point of an animal portrait and can convey a huge amount of personality and emotion. Getting the placement, shape, and reflection right will make your drawing feel alive.
8. Abstract and Experimental Drawing
Abstract drawing frees artists from the constraints of realistic representation, encouraging an exploration of line, shape, color, and texture as the primary subjects. Instead of capturing what something looks like, this approach focuses on conveying emotion, energy, or concepts through non-objective marks. This is an excellent idea for what to draw when you feel creatively stuck, as it prioritizes intuition and process over a perfect final product. From the pioneering compositions of Wassily Kandinsky to contemporary mixed-media experiments, abstract art is a powerful exercise in personal expression.
How to Get Started with Abstract and Experimental Drawing
Embracing abstract art is about letting go of expectations and trusting your creative instincts. The goal is to experiment and discover, not to create a recognizable image. This approach builds a deeper connection with your materials and your own artistic voice.
- Start with Basic Design Elements: Begin by focusing on one or two elements, like line and shape. Create a composition using only straight lines, then one with only curves. This simplifies the process and helps you see how basic components can create a compelling image.
- Experiment with Unconventional Tools: Move beyond pencils and pens. Try drawing with found objects like sticks, sponges, or string dipped in ink. Using non-traditional tools forces you to make marks in new ways, breaking old habits.
- Don't Overthink the Process: Put on some music and let your hand move across the page in response to the rhythm. The key is to draw from feeling rather than thought, allowing for spontaneous and authentic expression.
- Keep an Experimental Sketchbook: Dedicate a sketchbook just for abstract play. There are no rules here-doodle, scribble, layer materials, and explore without pressure. This becomes a visual diary of your creative discoveries.
Pro-Tip: Limit your color palette for an initial abstract piece. Working with just two or three colors helps you focus more on composition, texture, and line variation, preventing the piece from feeling chaotic.
9. Botanical Illustration
Botanical illustration is the meticulous art of depicting plant life with scientific accuracy and aesthetic grace. Far more than simply drawing a flower, this discipline is about documenting a plant's form, color, and details with precision. It's a brilliant idea for what to draw because it merges the worlds of art and science, demanding sharp observation and a delicate hand. This practice enhances your ability to render fine textures and complex structures, following a tradition seen in the works of pioneers like Maria Sibylla Merian and the detailed archives of Kew Gardens.
How to Get Started with Botanical Illustration
Capturing the delicate nature of plants requires patience and a systematic approach. The goal is to balance artistic expression with factual accuracy, which can be achieved by focusing on observation and technique.
- Work from Live Specimens: Whenever possible, draw from a real plant rather than a photograph. This allows you to observe it from all angles, understand its three-dimensional form, and notice subtle details in texture and color that photos often miss.
- Study Basic Plant Anatomy: Familiarize yourself with botanical terms like "petal," "sepal," "stamen," and "pistil." Understanding the function and structure of each part will translate into more accurate and convincing drawings.
- Use a Magnifying Glass: The essence of botanical art lies in the details. A magnifying glass is an invaluable tool for studying the intricate patterns on a leaf's surface, the fine hairs on a stem, or the delicate structure of a flower's reproductive parts.
- Practice Consistent Line Weights: Create clean, deliberate lines to define the plant’s form. Whether using a fine-tipped pen or a sharp pencil, consistent line control is key to achieving the clarity and precision characteristic of scientific illustration. If you're looking for an entry point, you can discover more about easy botanical illustration techniques on drawinglist.com.
Pro-Tip: Start with a simple subject, like a single leaf or a simple flower like a daisy. Focus on accurately capturing its outline, vein structure, and basic form before moving on to more complex, multi-part specimens.
9 Ideas to Draw: Comparative Overview
Drawing Type | Implementation Complexity | Resource Requirements | Expected Outcomes | Ideal Use Cases | Key Advantages |
|---|---|---|---|---|---|
Portrait Drawing | High – mastering proportions and emotions | Moderate – drawing materials, models | Realistic likeness, emotional depth | Commissioned art, figure drawing | Develops observation, emotional capture |
Nature and Landscape Drawing | Medium – atmospheric perspective and textures | Moderate – portable kit, outdoor access | Detailed natural scenes, mood setting | Outdoor studies, plein air, botanical art | Encourages outdoor activity, therapeutic |
Still Life Drawing | Low to Medium – controlled setting, lighting | Low – simple objects, good lighting | Technical skill, understanding light/shadow | Art education, material study | Full control over subject, foundational skills |
Fantasy and Mythical Creatures | High – anatomy + imagination blend | Moderate – references, imagination | Original mythical designs, storytelling | Gaming, entertainment, concept art | Unlimited creativity, anatomy development |
Urban Sketching and Architecture | Medium – quick perspective, on-location | Low to Moderate – portable tools | Captures urban life energy and architecture | Travel journaling, cityscape art | Develops quick sketch skills, perspective |
Character Design and Illustration | High – art + storytelling skills | Moderate – varied drawing tools | Memorable character concepts for media | Games, animation, comics | Combines narrative and visual design |
Animal Studies | Medium to High – varied anatomy + behavior | Moderate – photo/models references | Realistic or stylized animal representations | Wildlife art, pet portraits | Combines observation with natural science |
Abstract and Experimental Drawing | Low to Medium – no realism focus | Low – diverse materials possible | Personal style, creative expression | Fine art, art therapy, personal growth | Full creative freedom, experimentation |
Botanical Illustration | High – scientific accuracy + fine detail | Moderate – magnifiers, live specimens | Precise plant depiction, educational art | Scientific publications, education | Combines art with science, develops precision |
From Inspiration to Creation: Your Next Steps
The journey from a blank page to a finished piece of art always begins with that first spark of inspiration. We've journeyed through nine distinct and vibrant categories, each packed with unique ideas on what to draw, from the subtle expressions in a portrait to the sprawling complexity of an urban landscape. The true power of this exploration lies not in just reading the list, but in taking decisive action.
You now have a well-organized toolkit of prompts at your disposal. The key is to transform this potential energy into kinetic creativity. Avoid the common pitfall of "analysis paralysis," where you spend more time deciding what to draw than actually drawing. The most important step you can take right now is to simply begin.
Synthesizing Your Inspiration
Reflect on the categories we covered. Did the idea of capturing mythical creatures ignite your imagination, or did the thought of documenting the quiet dignity of a still life resonate more deeply? Perhaps the intricate details of botanical illustration or the dynamic energy of animal studies felt like a natural fit.
The value isn't in mastering every single genre at once. Instead, it's about recognizing which areas excite you the most and using them as a launchpad. By consistently practicing within these foundational themes, you are doing more than just filling a sketchbook; you are building a versatile and robust artistic skill set. Each drawing, no matter how small or imperfect, is a step toward developing your unique visual language.
Actionable Steps to Keep the Momentum Going
To bridge the gap between inspiration and creation, here are some practical next steps to keep your pencil moving and your creativity flowing:
- Choose One and Start Small: Don't overwhelm yourself. Pick just one category from this article that genuinely interests you. Commit to creating one small, low-pressure sketch based on that theme today.
- Combine and Conquer: Feeling adventurous? Try mixing prompts from two different categories. For example, draw a fantasy character doing some urban sketching, or create a still life that includes elements from nature. This practice pushes your creative boundaries.
- Establish a "Sketch-a-Day" Habit: The most effective way to improve is through consistent practice. Challenge yourself to a 7-day or 30-day drawing challenge using the prompts from this guide. This builds discipline and rapidly expands your visual library.
Ultimately, the goal is to cultivate a habit of regular creation. The more you draw, the easier it becomes to find ideas on what to draw. You start to see the world through an artist's eyes, finding inspiration in the mundane and the magnificent alike. Your sketchbook is a playground, not a stage for perfection. Embrace the process, celebrate your progress, and let every line you draw be a testament to your growing passion and skill.
Still searching for that perfect prompt to get you started? The Drawing List ideas generator is designed to eliminate creative block by providing endless, specific prompts tailored to your interests. Visit Drawing List to generate your next great idea in seconds.